Wearable Electronics: Arduino ISP ATTiny85 with WS2812/2811 addressable RGB LED strip
Many moons earlier, Mr.ChongSP ordered some individually addressable RGB LED strip (60LED/m) that uses WS2812 from middle country: aliexpress. Adafruit has a similar product, the Adafruit Neopixel. Yours truly manage to “BBS” 1x courtesy of Mr.ChongSP. Hardware is easy to procure, but “free” time to play with this new toy is hard to come by. Yours truly is working to the tune of “The Beatles-eight days a week” for the last couple of months. Nonetheless, when responsibility comes (to appear alongside Mr.JolyonC on stage for the Freshman Orientation Program “From Faraday to Fusion”), there is a need to push out the boat. The thing supposed to be a stage piece to grab freshie’s attention, so, addressable RGB LED on a jacket it shall be.
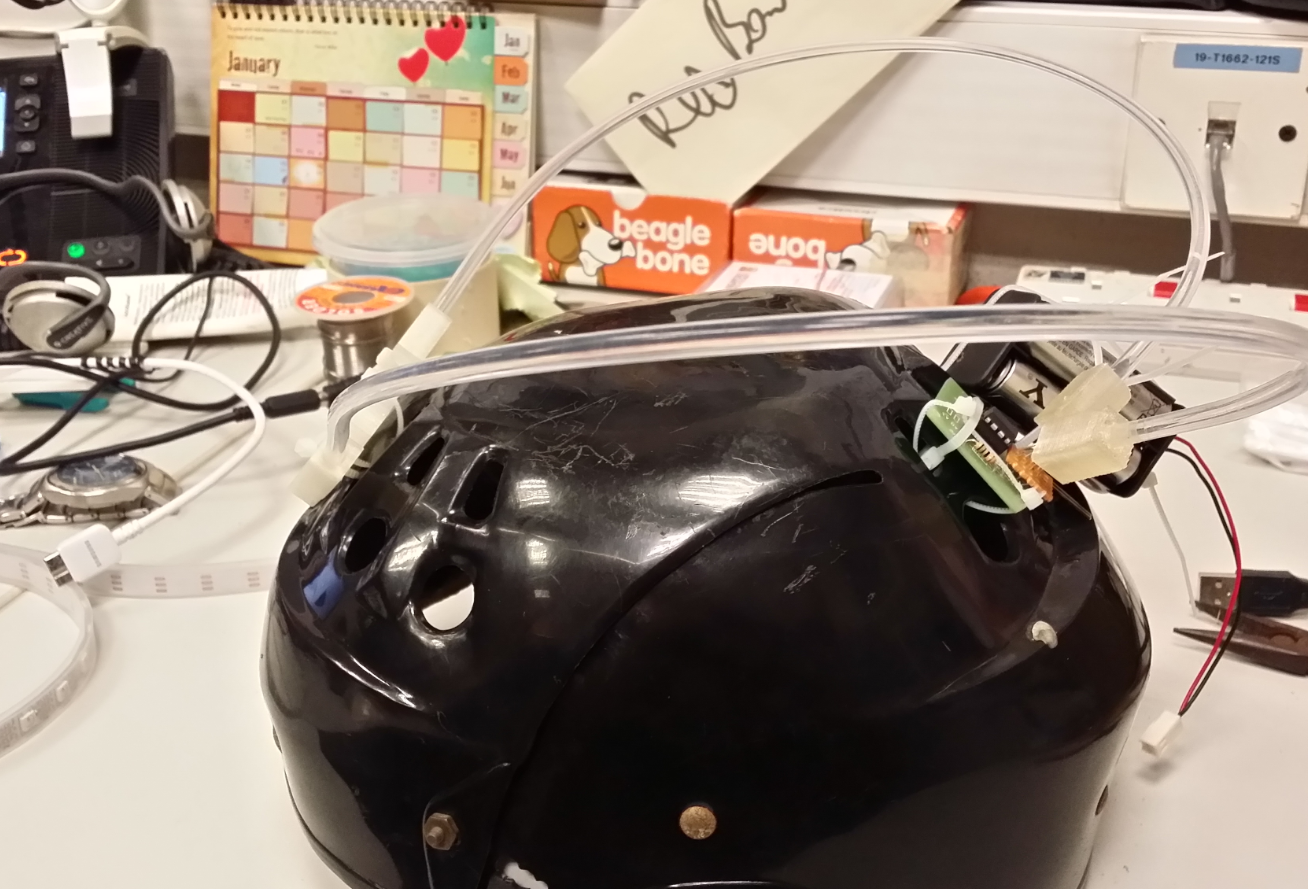
Since it is a wearable, there are several design (engineering) considerations. First, the Power supply unit, to power both the microcontroller (MCU) and the RGB LED Strip. Secondly, the size of the electronics package and thirdly, diffuser for RGB LED strip.
Since it is a wearable, there are several design (engineering) considerations. First, the Power supply unit, to power both the microcontroller (MCU) and the RGB LED Strip. Secondly, the size of the electronics package and thirdly, diffuser for RGB LED strip.
Using Arduino is a popular choice, given the footprint of it, it is easy to spot from a far. Not a good design choice. Furthermore, Arduino requires 9V supply whereas WS2812/2811 addressable RGB LED strip requires 5V. If both are used together, there is a need for a separate circuitry with both 7895 5v and 7809 9v voltage regulators, with supply being 12V 1A. Having said that, 12V battery pack and voltage regulator circuitry increase the footprint of the total package.
Therefore, the logical choice would be ATTiny85 that can be powered off from a 3to6V battery; PSU is a 5V 1A mobile power bank with USB connector that is meant for charging smart phones on the go. The choice of this PSU can be used to power both the addressable RGB strip and also ATTiny85.
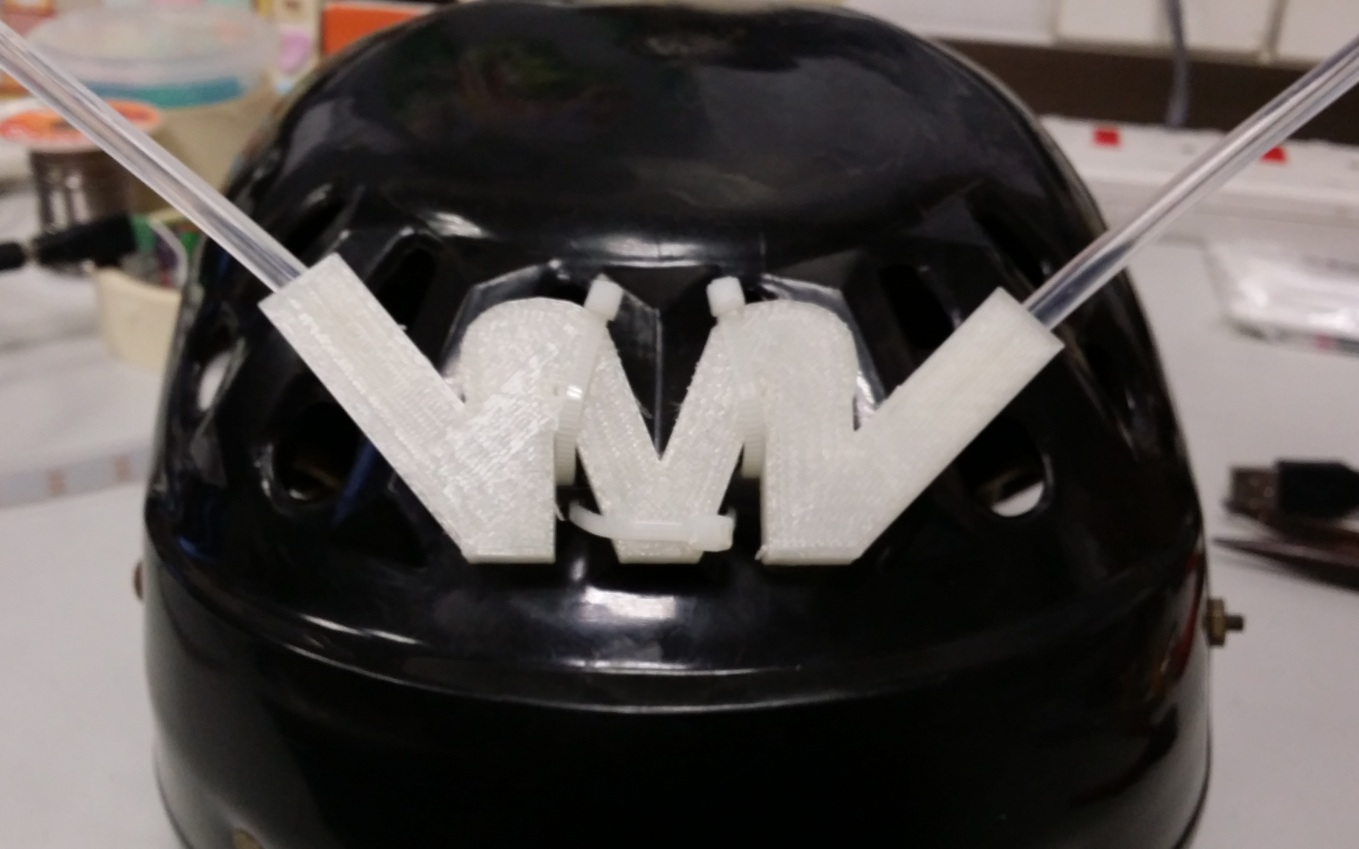
As for the diffuser, 3D printed spikes using ninjaflex http://shin-ajaran.blogspot.sg/2014/04/3d-printing-using-ninjaflex-with.html !
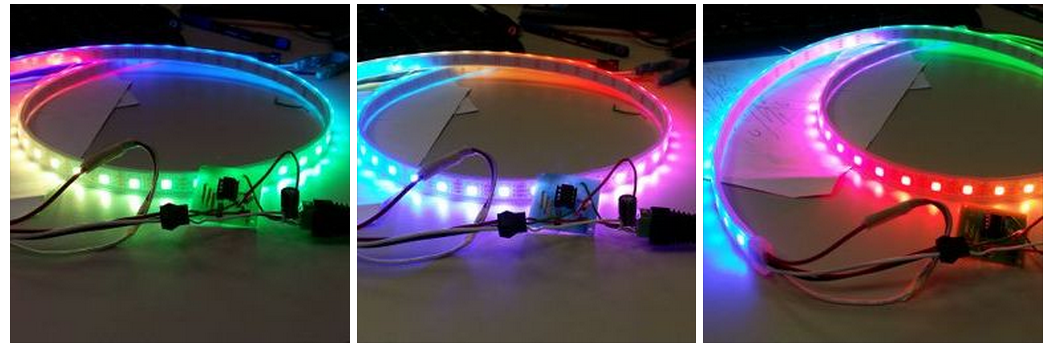
closeup
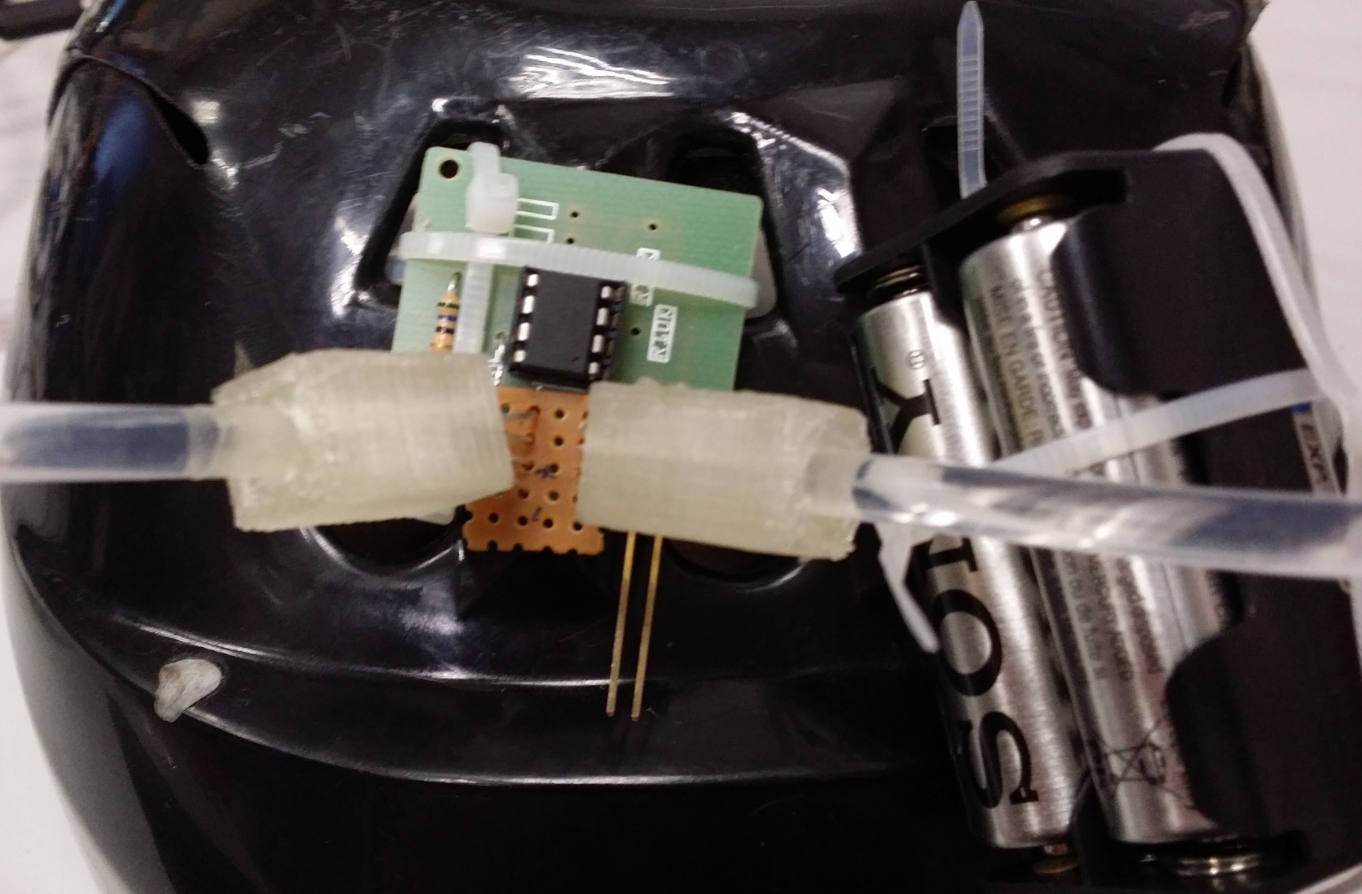
Parts needed
1x Arduino as the In System Programmer (ISP); detail guide here http://shin-ajaran.blogspot.sg/2014/01/setting-up-software-for-using-arduino.html
1x ATTiny85 ISP shield; detail guide here http://shin-ajaran.blogspot.sg/2014/01/setting-up-hardware-for-using-arduino.html
1x ATTiny85 break out board of choice; using custom MitG PCB
1x ATTiny85
1x WS2812/2811 addressable RGB LED strip (it can be neopixel from adafruit, or pseudo neopixel from middle country:aliexpress)
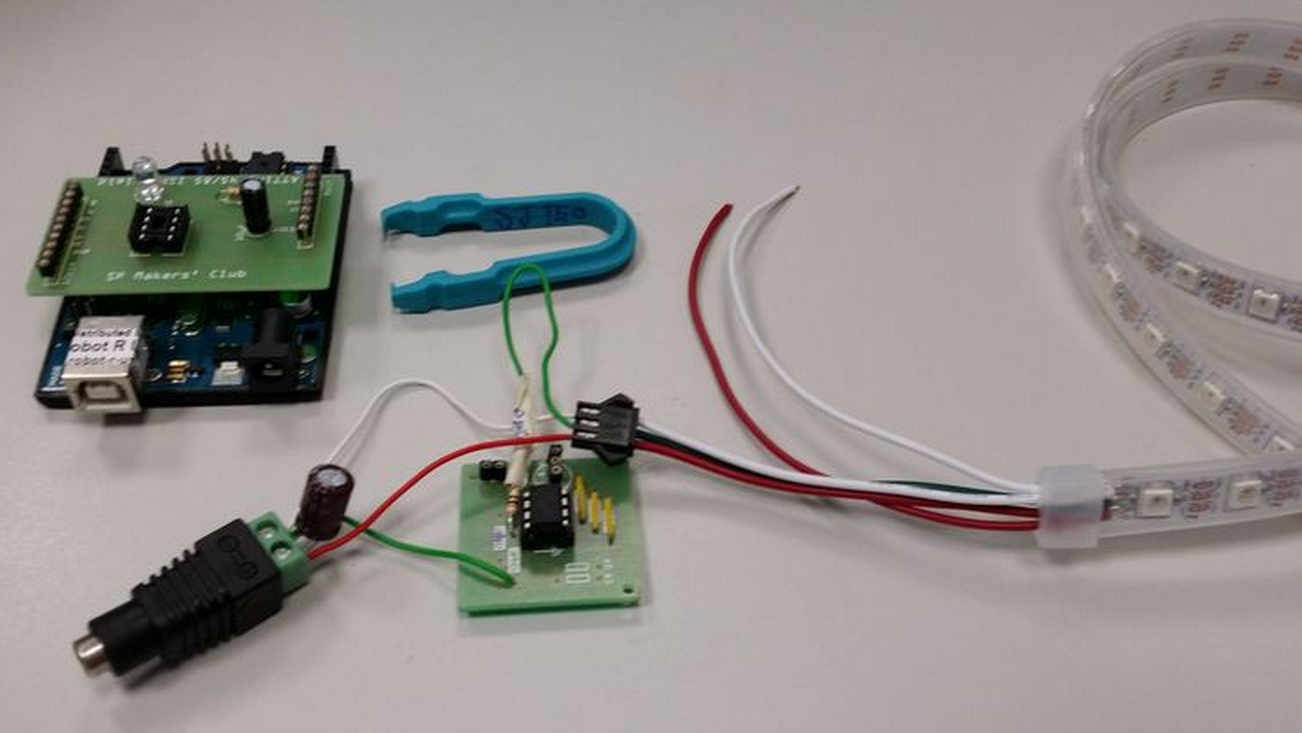
Courtesy of the techno arsenal available to SP MAKERS CLUB, all of the parts listed above are available, as per display in the image above.
Setting up the software environment
Although the RGB LED strips on hand are not Adafruit Neopixel, thanks to the Adafruit neopixel code library released on github https://github.com/adafruit/Adafruit_NeoPixel , it really saves a lot of time and effort by not re-inventing the wheel.
The “now” trend of selling a product over the Internet: In order to increase ownership from non-techines, the manufacturers will produce very detail idiot proof step by step guide. In neopixel example, the UBERGUIDE is definitely very useful. In the hands of a techie, it became some sort of cheat code, using it far from the intended purpose.
Thus, follow the UBERGUIDE (URL is in references section at the bottom of this post) closely to setup the software environment.
Setting up the hardware
Wiring is dead easy. Data pin from the addressable RGB LED strip to pin of your choice. In this case, digital pin4 of ATTiny85. NOTE: must ensure common ground by connecting ground wire of RGB LED strip to ground pin of MCU.
Programming the hardware
First, ensure all the hardware are setup accordingly to the tutorial earlier. E.g ATTiny85 on the ISP shield, ISP shield on the Arduino. USB cable is plugged in, and drivers are installed for Arduino.
Set the “programmer” to Arduino as ISP, as depicted in the image above.
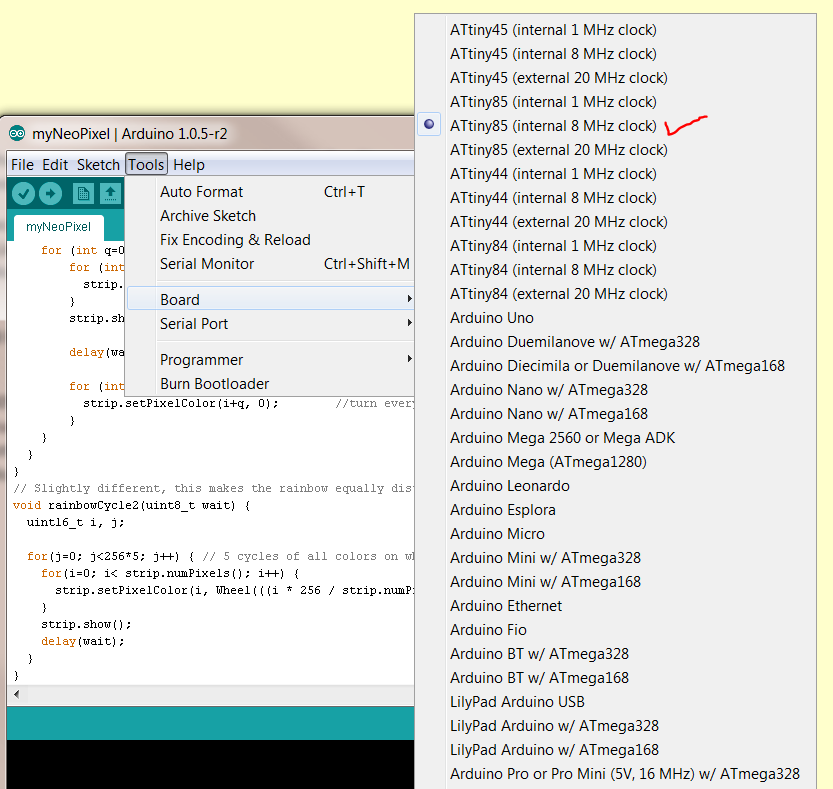
Set the “board” to ATtiny85 8MHz. Rule of thumb, choose 1MHz if low energy consumption is required, the downside, computation speed of the code will be affected. 20MHz option will not work out of the box, this option requires an external oscillator as the clock.
Set the “Serial Port” to the one detected on your computer.
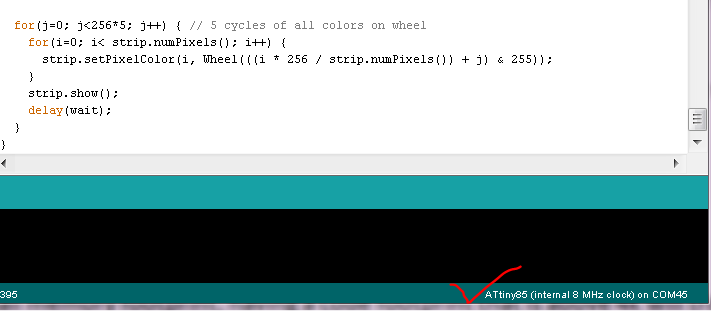
Double check the “parameters” on the lower right hand corner as depicted in the image above.
Everything seems to be prim and rosy. But we are not done yet.
If ATTiny85 is new out of the box, need to do the following step to burn the “bootloader”. Otherwise the code will be compiled, downloaded accordingly, but could not start the program upon reset.
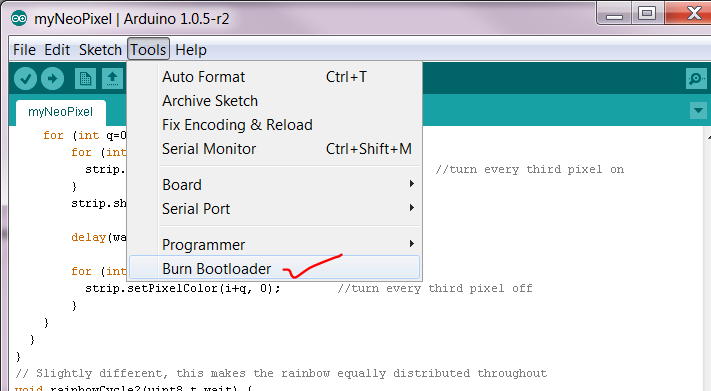
Else, the above can be skip if the ATTiny has been programmed at 8Mhz.
Source code is in public domain using the following URL
Now, click the upload button! Fingers crossed if it pleases you.
Plug in the USB power bank to test.

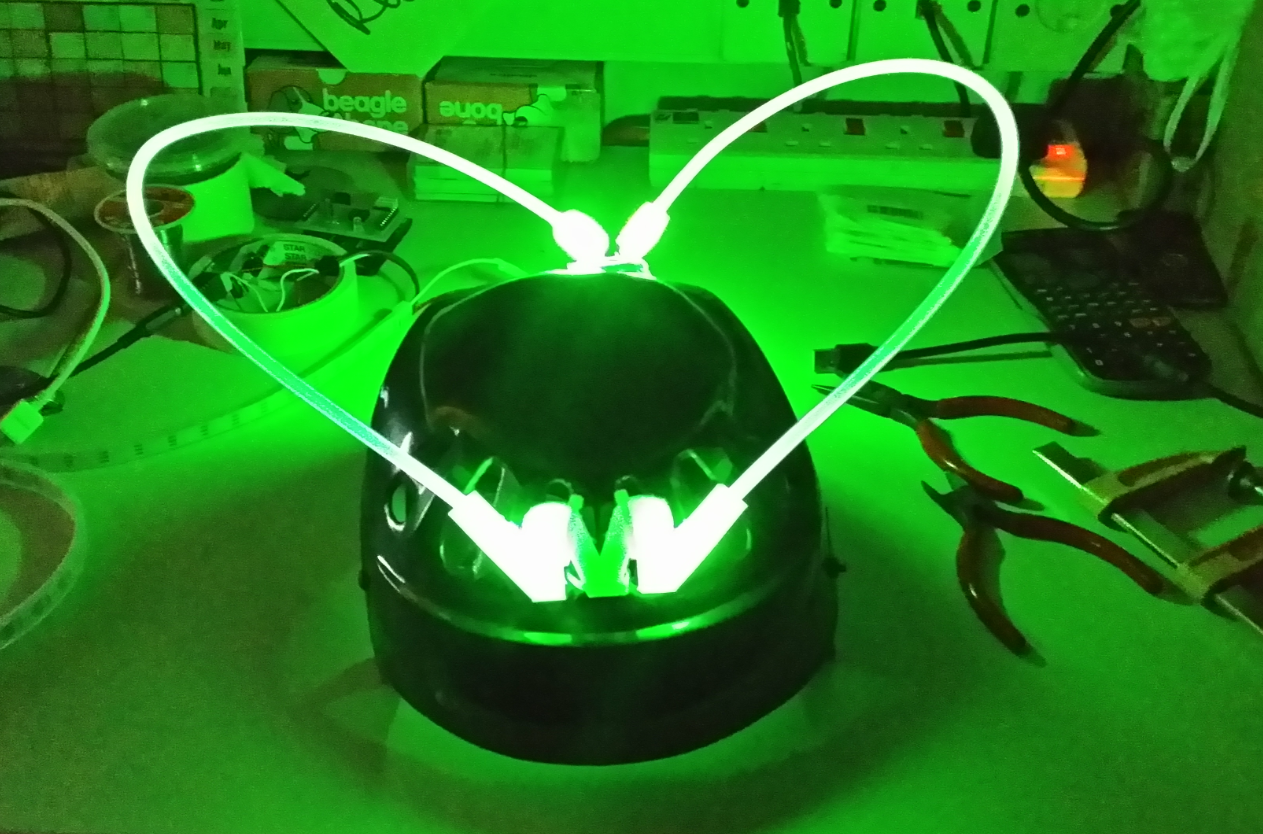
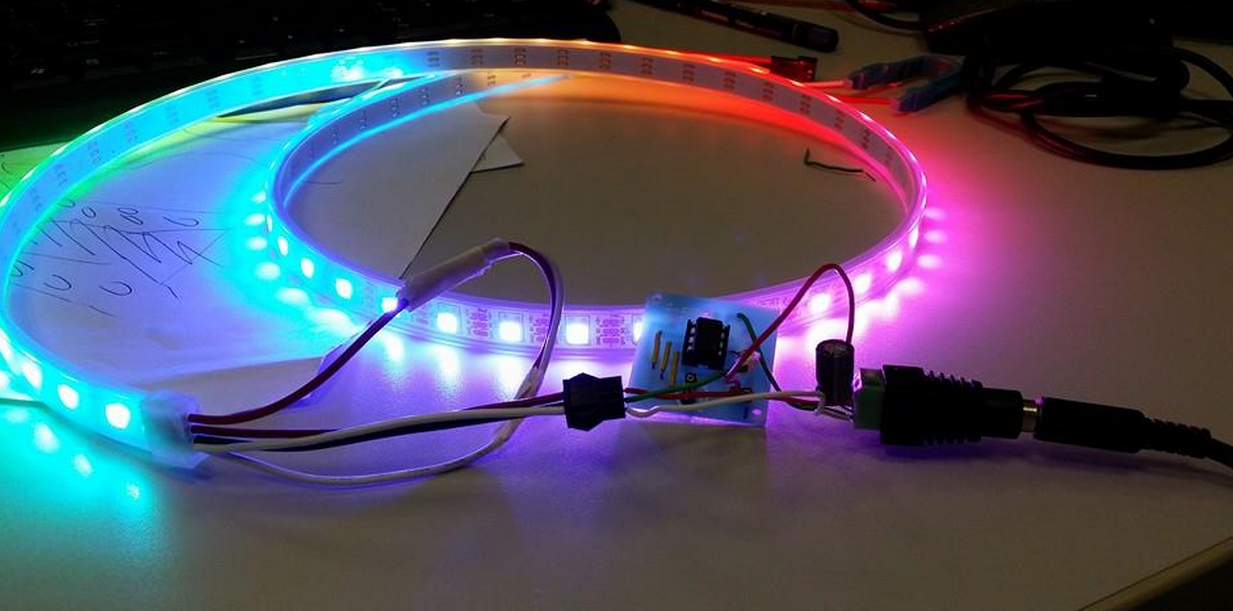
Wearable electronics = WS2812/2811 RGB LED strip+ ninjaFlex + ATTiny85 + Arduino + USB Mobile Power Bank + visibility vest
Video
Notes:
ATTinyXX MCU has very small memory footprint; having a code footprint that is above 4k will trigger an error “relocation truncated to fit: R_AVR_13_PCREL”. Use the patch and description of the error from the following URL http://forum.arduino.cc/index.php?topic=116674.0 to fix this error
References
Ada fruit Neopixel code guide https://learn.adafruit.com/adafruit-neopixel-uberguide/arduino-library