updates
DIY sous vide part II with vacuum hack.
DIY sous vide ala ghetto
DIY sous vide with hot water tap
Arduino sous vide
DIY sous vide K type thermocouple
Arduino DIY sous vide rack of lamb
DIY sous vide ala ghetto
DIY sous vide with hot water tap
Arduino sous vide
DIY sous vide K type thermocouple
Arduino DIY sous vide rack of lamb
DIY sous vide on the cheap
I came across this idea of cooking on the Internet late last year. It seems to me the objective of preserving the juiciness of the meat cooked in this manner is all but mostly mouth watering. Youtube have some very excellent experiments on cooking via this manner. Check out the excellent cooking video by a user paste at the footer of this post!
A quick lookup on wikpedia http://en.wikipedia.org/wiki/Sous-vide gave me some idea on the setup. Sous-vide ( /suːˈviːd/; French for "under vacuum")[1] is a method of cooking food sealed in airtight plastic bags in a water bath for a long time—72 hours in some cases—at an accurately determined temperature much lower than normally used for cooking, typically around 60 °C (140 °F). The intention is to cook the item evenly, not overcook the outside while still keeping the inside at the same 'doneness' and to keep the food juicier.
From the write-up, i knew I would need a few hardware and some software to cook via sous-vide. A vacuum pump with vacuum sealing apparatus, a heating appliance that is capable of regulating the desired temperature, and a reliable thermometer. A quick check online shows that commercial sous-vide setup could run into the hundreds, if not thousands. A poor chap like me would take months just to save enough for it. But I could not wait nor willing to let it go.
If you look hard enough, there are cheaper alternatives. Sometimes it might require some form of hacking.
Stuff you might need
1. Vacuum pump with vacuum sealing apparatus. I reuse a bag and shower gel dispenser it for free.
2. Heating appliance. I got it for S$9.90
3. Temperature controlled regulator. I got it for $39.90
4. cooking thermometer. I got it for S$14.70
total=S$64.50
Check out my DIY sous vide setup!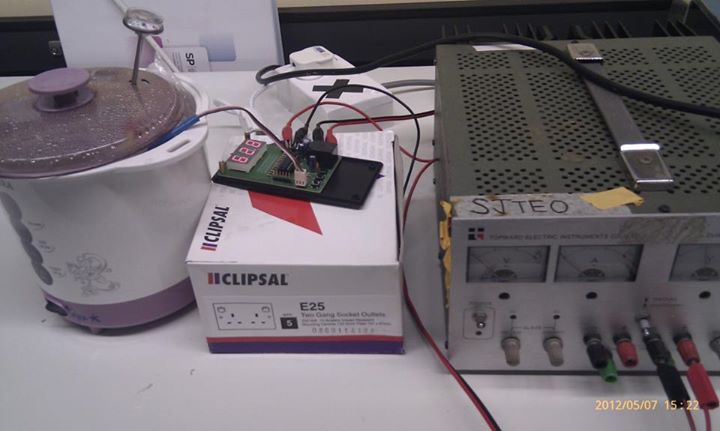
The center of this sous vide setup, is the device that could regulate cooking temperature. In other words, I would need something such as a PID temperature controller circuit. With that inmind, i went for a quickie at sim lim tower. I got a FutureKit FK945 for S$39.90.
The kit was left on my desk for more than a few months, because I can’t really find time to get it solder :( luckily, there is not expiry date on it.
FK945 DIGITAL TEMPERATURE CONTROLLER This digital circuit is used to control temperature. The circuit will be cut-off when the actual temperature is higher or lower than the set temperature. It can be used for real application such as with the hatching machine and automatic on-off electric fan.
My student Keyou is part of my project by helping me with the soldering and wiring the AC face plate. Thanks~~!
For those that can’t wait to get your hands on the kit set, you can drool over the wiring diagram at the moment. http://www.futurekit.com/2009/manual/future/eng/PDF_FK9/fk945e-1.pdf
It came with a temperature sensor, 18B20, http://datasheets.maxim-ic.com/en/ds/DS18B20.pdf
The +ve temperature range is not very wide, but good enough for sous vide cooking. From the performance specs sheet, this sensor is most accurate at the region of 55degC to 60degC. This makes it one of the more desirable characteristic for sous vide cooking which calls for cooking at 55degC to 70degC, depending on the item being cook.
One thing to note, there is no mention of whether this sensor is water proof. Some primitive way of waterproofing, such as heat shrink tube applied to the metal connectors, the sensor and wires enclosed in a Cat5 cable insulator, the whole sensor is then enclosed in a straw and then sealed with a cable tie. This is not the best way, but sufficient for the sensor to be use for the 2nd time. LOL 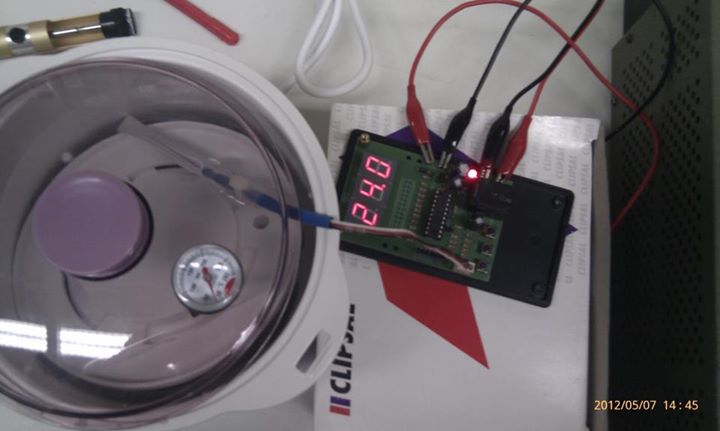
Looking at the wiring diagram, I could use a AC electrical heating appliance. I am just wondering what type of device should i use? A thermos jug with 1L capacity? 1 Rice Cooker? An induction cooker? Cost is my major concern. Therefore, I went to a second hand shop available locally. Cash Converter that is.
With a stroke of luck, I came across this electric boiler/cooker that cost only S$9.90. Compared relatively to the new appliance in the store that cost S$30 and above, this cooker is definitely a steal. With a mad dash, I made my way to the counter and paid for it. Just in case somebody would snatch it from me :) 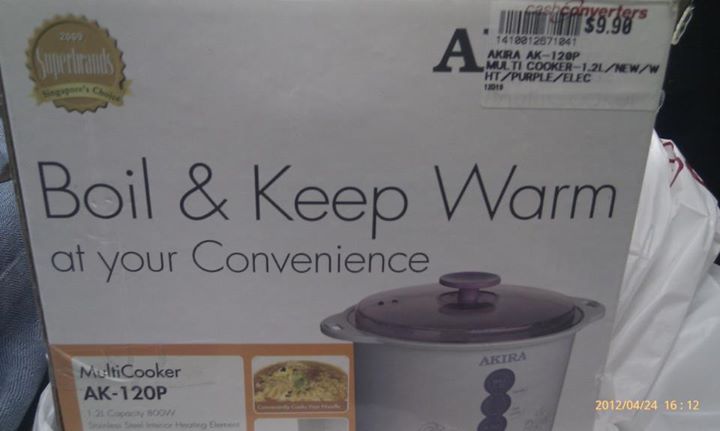
Next, a cooking thermometer. This is an easy one. I got it at Poon Huat, the local confectionary specialist at a price of $14.75. It is critical that the food is heated to a “real” temperature, instead of the temperature read by the sensor. 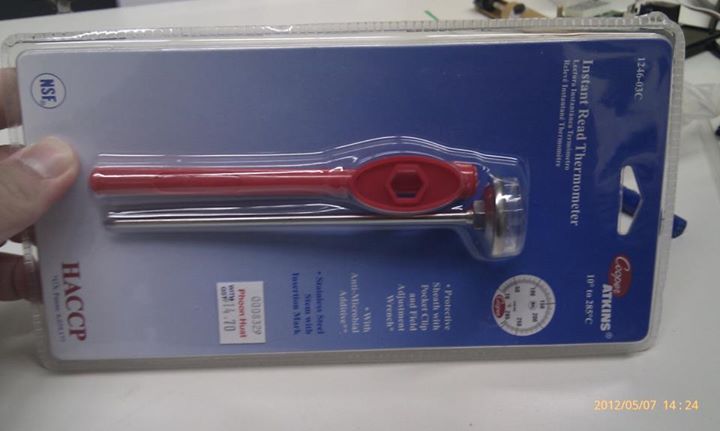
As for the vacuum portion. I did it on a really cheap method. I got a food grade Glade Ziploc bag and suck out the air out of it using a straw in my mouth. After a few tries, I gave up. The more efficient way would be using a “pump” from the hand soap/shower gel dispenser. Shove the tube end into the vacuum bag, secure it with the “loc” and start to pump the excess air out rigorously. Good exercise i would say. How much to pump?? Just make sure there is not enough air in the bag to make the items being cook floating in the cooker. Hence, the temperature will not be even throughout. The food bag must be submerged completely to achieve the consistency in cooking temperature. I have modified a USB vaccuum pump as my “vacuum sealer”
Before cooking, it is very important to calibrate the DIY sous vide setup. The instruments to calibrate are the PID controller, the thermometer and the temperature. The most simple way is to boil the water in the cooker, insert the thermometer and ensure that it reads 100degC, insert the sensor from the PID controller and check whether it is registering a value of 99.9 degC on the 3x 7Segment display.
Now, the big question. What to cook???
As daring and bold as I would want to try to sous vide a piece of dry-aged USDA Prime black angus filet mignon. But I came to realise that a botched experiment would set me back more than the cost of my sous vide setup. I couldn’t risk my lunch $$$$ for the next three months. So, eggs it shall be. I got 2 pieces for 80cents from Food Court 3. In search of the perfect half boil egg my grandma would make at the coffee shop without fail. She only had a metal container (actually it is the 1kg planta margarine container ) and yet she can achieve the consistency. I wonder if i could do that with my DIY sous vide? I will not know, unless I attempt at it, record data and make some inference from the collected data. The following picture consist of eggs cooked at the same temperature 64degC but at varying timing. 
A literature review on previous experiment landed me on this page
which attempts to explain the thermodynamics and heat transfer of the perfect soft boiled egg.
From the data, I start to formulate the hypothesis of sous vide the eggs at 61.5degC for 45 min, follow by a Post Treatment of shocking the eggs at a temperature of 90degC for 2 min. Reducing the time from 4hours as suggested by the various sources to 47Mins. Hoping to achieve a runny and custard like texture to the egg white, and perfectly soft but set egg yolk. The time is meant for a busy coffee shop. The eggs will be pre-prepared ala sous vide (it will not be cook thoroughly and kept it that way), when serving time, shock with a very hot water bath.
Moment of truth.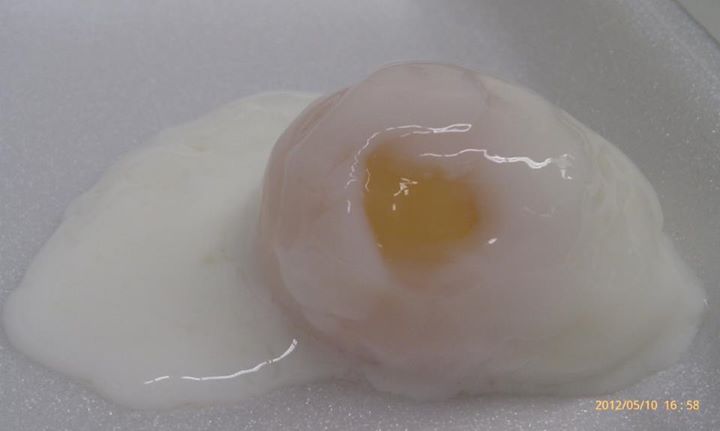
While referring to the egg matrix, the egg that is cook at 61.5degC for 45min, achieve a setting of 62.2degC. As for the egg that received the post treatment, it achieve a texture as if it was sous vide at 80degC. I came to realise, timing is very important if I do want to do the shock treatment.
What would you want me to experiment next?

1 comment:
just came across this... this is what i want to achieve
http://blog.khymos.org/wp-content/2011/04/egg_63C_pre_post_boil.jpg
will try it the next time.
Post a Comment