Friday, June 8, 2012

DIY sous vide partII

As mentioned by me previously on my new found interest in sous vide cooking. The vacuum pump mechanism used by me was totally primitive. The air in the sealable plastic bag was sucked out by mouth. eewwwwww...

Using of a handheld vacuum cleaner is possible, but the cost of it at $99 put me off. The local surplus do carry it, but the condition of it is really horrible and certified not food worthy (by me).

I was so occupied with work last month, going down to Sim Lim Square (SLS) was a luxury. No luck with the local computer stores too. Finally, my calls for a USB vacuum cleaner was answered. It only cost me SGD9 from a friend that help me get from SLS. I get to pass the leather shoe cost to him. teeheeeheee.

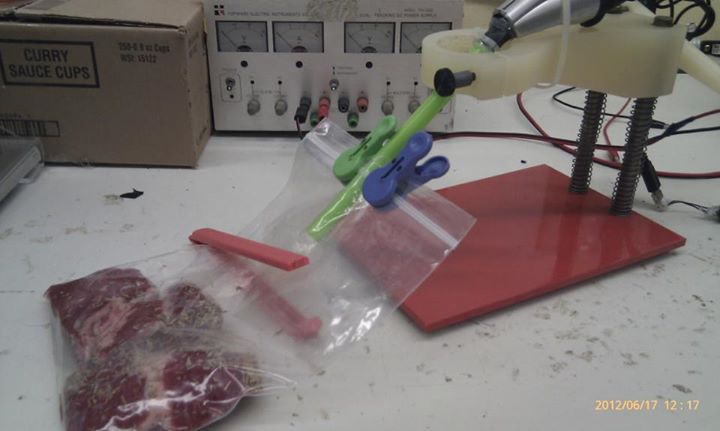
Using the USB vacuum cleaner powered by the computer's USB port, only very very small particles such as bits from the food I ate, dust particles and strands of hair could be picked up. I tried the stock  USB vacuum cleaner with the re-sealable plastic bag, hardly any air could be suck out by the shorty snout. The DC motor in it was not working hard enough. Time to do some quick hack!

Knowing that USB ports supply 5V and up to 200mA only. If the DC motor in the USB vacuum cleaner to be revving at a even higher RPM, more current need to be supplied to it. Furthermore, the stock "snout" of the device is flat, restricting air flow. So my quick hack would be 1. modify an extended snout to allow more air flow, and 2. up the voltage and current.

The extended "snout" was made with courtesy of Mr.Bean drinks stall, which supplied me with the large diameter drinking straw, some hot glue and a cable tie, I am a good to go. I also made some USB connector to DC female jack to make use of a wall power supply, and DC male jack to 9V battery holder.


 I can't wait to get it turn on.....but wait. What should I experiment with for this modified USB vacuum cleaner? I simply took a small metal cup an shoved it in the bag and start the DC motor with 9V 800mA.

Listen to the sound of JOY!

Now, the yummy for the tummy portion.
Sous vide chicken breast on the cheap
1. 1pcs chicken breast (with or without skin)
2. salt and pepper to taste
3. pack in the bag with some herbs and vacuum it.
4. sous vide at 60deg C for at least 2 hours.

                                            skinless, boneless chicken breast seasoned with rosemary
                                             tender, juicy,
                                           chicken breast with skin and breast bone seasoned with cumin seeds
                                       sous vide 60deg C for 2hours minimum

                                       look at the perfect PINK.

NEXT, I am working towards the holy grail of sous vide, the perfect steak.

Tuesday, May 8, 2012

DIY sous vide


updates DIY sous vide part II with vacuum hack.
DIY sous vide ala ghetto
DIY sous vide with hot water tap
Arduino sous vide
DIY sous vide K type thermocouple
Arduino DIY sous vide rack of lamb

DIY sous vide on the cheap

I came across this idea of cooking on the Internet late last year. It seems to me the objective of preserving the juiciness of the meat cooked in this manner  is all but mostly mouth watering.  Youtube have some very excellent experiments on cooking via this manner. Check out the excellent cooking video by a user paste at the footer of this post!

A quick lookup on wikpedia http://en.wikipedia.org/wiki/Sous-vide gave me some idea on the setup. Sous-vide ( /suːˈviːd/; French for "under vacuum")[1] is a method of cooking food sealed in airtight plastic bags in a water bath for a long time—72 hours in some cases—at an accurately determined temperature much lower than normally used for cooking, typically around 60 °C (140 °F). The intention is to cook the item evenly, not overcook the outside while still keeping the inside at the same 'doneness' and to keep the food juicier.

From the write-up, i knew I would need a few hardware and some software to cook via sous-vide. A vacuum pump with vacuum sealing apparatus, a heating appliance that is capable of regulating the desired temperature, and a reliable thermometer. A quick check online shows  that commercial sous-vide setup could run into the hundreds, if not thousands. A poor chap like me would  take months just to save enough for it. But I could not wait nor willing to let it go.

If you look hard enough, there are cheaper alternatives. Sometimes it might require some form of hacking.

Stuff you might need
1. Vacuum pump with vacuum sealing apparatus. I reuse a bag and shower gel dispenser it for free.
2. Heating appliance. I got it for S$9.90
3. Temperature controlled regulator. I got it for $39.90
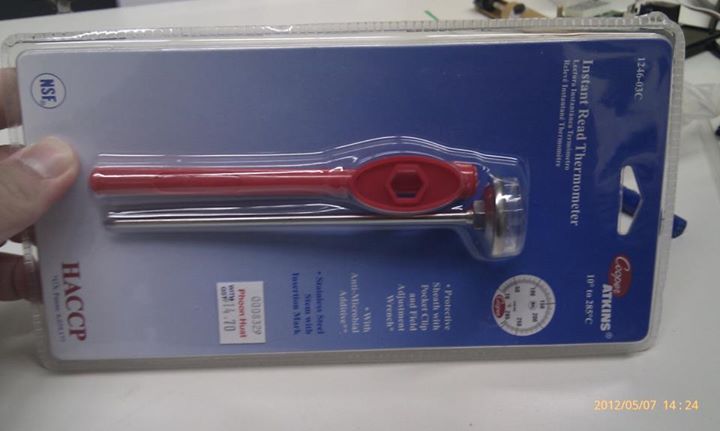
4. cooking thermometer. I got it for S$14.70
total=S$64.50
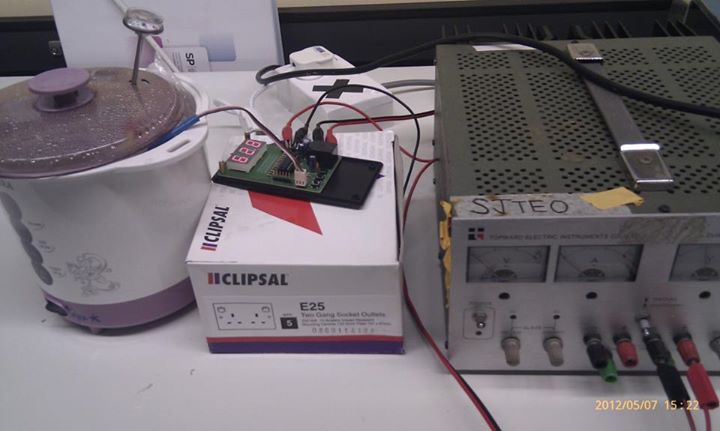
Check out my DIY sous vide setup!

The center of this sous vide setup, is the device that could regulate cooking temperature. In other words, I would need something such as a PID temperature controller circuit. With that inmind, i went for a quickie at sim lim tower. I got a FutureKit FK945 for S$39.90.

The kit was left on my desk for more than a few months, because I can’t really find time to get it solder :( luckily, there is not expiry date on it.

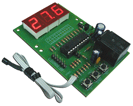
FK945 DIGITAL TEMPERATURE CONTROLLERThis digital circuit is used to control temperature. The circuit will be cut-off when the actual temperature is higher or lower than the set temperature. It can be used for real application such as with the hatching machine and automatic on-off electric fan.

My student Keyou is part of my project by helping me with the soldering and wiring the AC face plate. Thanks~~!
For those that can’t wait to get your hands on the kit set, you can drool over the wiring diagram at the moment. http://www.futurekit.com/2009/manual/future/eng/PDF_FK9/fk945e-1.pdf

It came with a temperature sensor, 18B20, http://datasheets.maxim-ic.com/en/ds/DS18B20.pdf
The +ve temperature range is not very wide, but good enough for sous vide cooking. From the performance specs sheet, this sensor is most accurate at the region of 55degC to 60degC. This makes it one of the more desirable characteristic for sous vide cooking which calls for cooking at 55degC to 70degC, depending on the item being cook.

One thing to note, there is no mention of whether this sensor is water proof. Some primitive way of waterproofing, such as heat shrink tube applied to the metal connectors, the sensor and wires enclosed in a Cat5 cable insulator, the whole sensor is then enclosed in a straw and then sealed with a cable tie. This is not the best way, but sufficient for the sensor to be use for the 2nd time. LOL

Looking at the wiring diagram, I could use a AC electrical heating appliance. I am just wondering what type of device should i use? A thermos jug with 1L capacity? 1 Rice Cooker? An induction cooker? Cost is my major concern. Therefore, I went to a second hand shop available locally. Cash Converter that is.
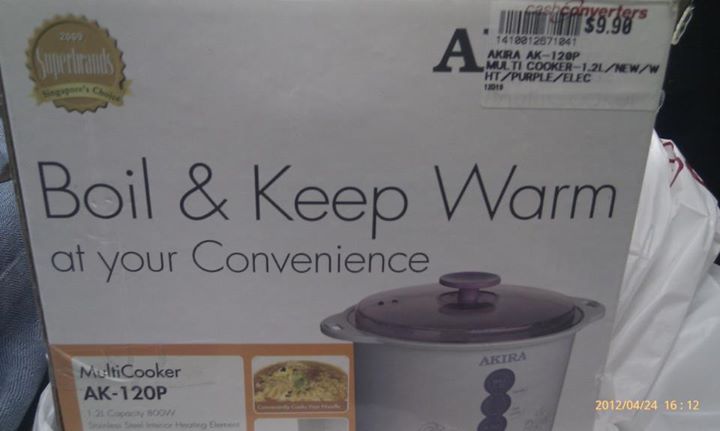
With a stroke of luck, I came across this electric boiler/cooker that cost only S$9.90. Compared relatively to the new appliance in the store that cost S$30 and above, this cooker is definitely a steal. With a mad dash, I made my way to the counter and paid for it. Just in case somebody would snatch it from me :)

Next, a cooking thermometer. This is an easy one. I got it at Poon Huat, the local confectionary specialist at a price of $14.75. It is critical that the food is heated to a “real” temperature, instead of the temperature read by the sensor.
As for the vacuum portion. I did it on a really cheap method. I got a food grade Glade Ziploc bag and suck out the air out of it using a straw in my mouth. After a few tries, I gave up. The more efficient way would be using a “pump” from the hand soap/shower gel dispenser. Shove the tube end into the vacuum bag, secure it with the “loc” and start to pump the excess air out rigorously. Good exercise i would say.  How much to pump?? Just make sure there is not enough air in the bag to make the items being cook floating in the cooker. Hence, the temperature will not be even throughout. The food bag must be submerged completely to achieve the consistency in cooking temperature. I have modified a USB vaccuum pump as my “vacuum sealer”
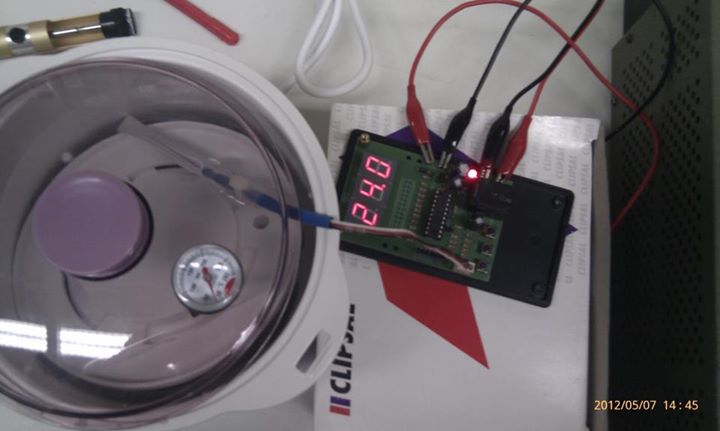
Before cooking, it is very important to calibrate the DIY sous vide setup. The instruments to calibrate are the PID controller, the thermometer and the temperature. The most simple way is to boil the water in the cooker, insert the thermometer and ensure that it reads 100degC, insert the sensor from the PID controller and check whether it is registering a value of 99.9 degC on the 3x 7Segment display.

Now, the big question. What to cook???
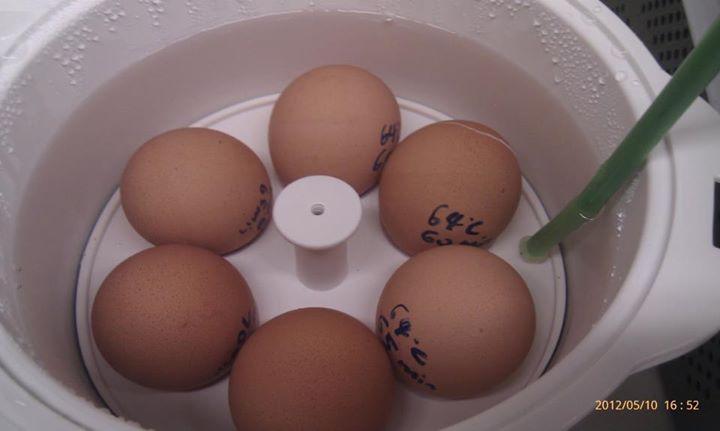
As daring and bold as I would want to try to sous vide a piece of dry-aged USDA Prime black angus filet mignon. But I came to realise that a botched experiment would set me back more than the cost of my sous vide setup. I couldn’t risk my lunch $$$$ for the next three months. So, eggs it shall be. I got 2 pieces for 80cents from Food Court 3. In search of the perfect half boil egg my grandma would make at the coffee shop without fail. She only had a metal container (actually it is the 1kg planta margarine container ) and yet she can achieve the consistency. I wonder if i could do that with my DIY sous vide? I will not know, unless I attempt at it, record data and make some inference from the collected data. The following picture consist of eggs cooked at the same temperature 64degC but at varying timing.

A literature review on previous experiment landed me on this page
which attempts to explain the thermodynamics and heat transfer of the perfect soft boiled egg.

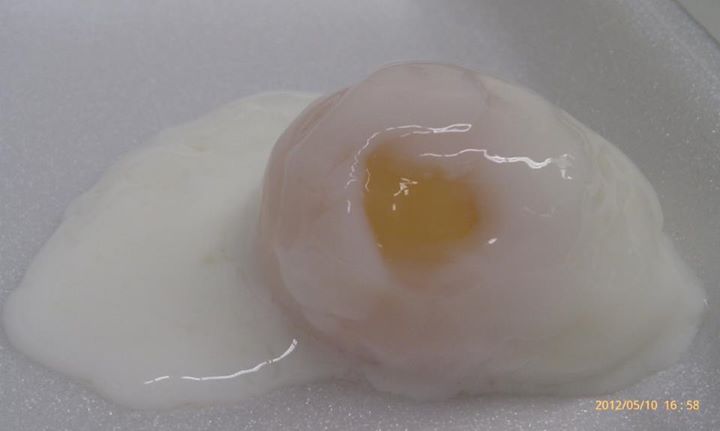
From the data, I start to formulate the hypothesis of sous vide the eggs at 61.5degC for 45 min, follow by a Post Treatment of shocking the eggs at a temperature of 90degC for 2 min. Reducing the time from 4hours as suggested by the various sources to 47Mins. Hoping to achieve a runny and custard like texture to the egg white, and perfectly soft but set egg yolk. The time is meant for a busy coffee shop. The eggs will be pre-prepared ala sous vide (it will not be cook thoroughly and kept it that way), when serving time, shock with a very hot water bath.


Moment of truth.


While referring to the egg matrix, the egg that is cook at 61.5degC for 45min, achieve a setting of 62.2degC. As for the egg that received the post treatment, it achieve a texture as if it was sous vide at 80degC. I came to realise, timing is very important if I do want to do the shock treatment.


What would you want me to experiment next?


Tuesday, March 6, 2012

[arduino] Music to RGB with LOLSs

Just in case you guys wonder, the previous LOLSs suffers from oxidation, poor solder joints and frequent breakdown with intermittent connectivity. Lih Sheng + helmi had kindly solder another piece of it for my use. Not to forget Kay Jin for helping to fix the broken leads on the RGB LEDs . Thanks!~

As of the previous challenge #3 posted to the lads and lasses to make the RGB LED change colour according to music, sadly none came forward and show me their stuff! Why I got to do everything myself
:(

update Sept 2012 this project was incorporated on a headphone and featured at Singapore Maker Faire


Time is a rare commodity. It is very difficult to prioritize which should come first (interest, hobby, $, love, life, work). So to save time, we should reuse as much as possible of what the stuff we had done previously!

If you guys could still recall my Arduino VU spectrum analyzer with FFT using LOL shield, courtesy of Andy Doro. Ready code are available for converting analog data on time domain to frequency domain.

The tricky part is actualy "mapping" the amplitude of each frequency bands (14 bands in total, coded for the LOL shield) and for all of the frequency bands into RGB. To further make the matter more complicated, Amplitude transition within each frequency band should be represented with the intensity/lumen of the RGB via the use of PWM, follow by hue/fading when transition in-between frequency bands.  Courtesy of "akgraphics" for the hue controlled RGB, my this experiment was made slightly easier......

In other words, my idea is to
1. Arrange the frequency bands into 3 "groups", low mid and high frequency and "map" into R, G then B.
2. Amplitude of each frequency band would translate into the brightness/intensity of each colour using PWM
3. Cycling from one frequency band to another, the R<->G<->B would "fade" by changing the hue of each colour.

Now, for the connection part
Using a 3.5mm" stereo jack to tap audio signal from computer/smart phone into A0 of arduino.
PWN pin 9,10,11 are use for controlling the RGB. LOLSs (it has a darlington IC) is used to "switched" 12v for the RGB LED strip with PWM.


 Just a point to note, test your RGB LED first. One of the RGB LED is not functioning properly when the pin for Red is held logic high. Time to get more RGB LED strips.


SWEEEET! Not bad for the first iteration.


If you have notice from the video, the "mapping" of sound frequency to RGB is not ideal. I get mostly RED, yes RED LIGHT. It is going to be any EYE SORE if I would stick this LED strip on my cheapo headphone as a bling bling. More time is needed to discover the relationship between the frequency appeared in music and the relevant colour to represent it (through code, that is). *hint: use the serial monitor* Another thing to note, how to repackage it so small (code size is 6k only), easy to retrofit on existing headphones (I DIZZ pseudo DR.Dre beats/senheizer), battery operated etc. Did I mentioned $$$ making?! LOL

Here comes the SUGAR. It can be intimidating, but the comments should make you feel at ease. Feel free to use/modify and let's ROXXX! Share your findings. A ping on new discoveries are much appreciated.

Saturday, February 18, 2012

[wares]

Still remember my HDD hack back in 2009?

Last tuesday, my E8410 suffered a BSOD then followed by a core dump.
It din't managed to reboot after all that. Can't even complete the POST (Power On Self Test)

I have tried various troubleshooting sequence, trying to isolate the problem.
1. Ram, by swapping fresh rams.
2. Pull out the hdd and CDrom just to boot from bare machine

It has beeping sounds, with various sequence.
1 long 2 short
1 long 3 short
4 short
=============================================

FML, time to waste $$$ again.

Tuesday, February 14, 2012

[game] Shogun2 Legandary difficulty level for Tokugawa clan pt2

Perseverance my friends. After countless events of total annihilation by my rival daimyos', my army turned against me, rebellion created by enemy monks. I survived until turn 220.

The methodologies to win the war are rather idiosyncratic. War is all about money and economics. 

My shogunate could not progress at the tech tree at a faster pace then my rivals. Hence my soldiers are mainly regular yari ashigaru and bow ashigaru with the exception few units of sword samurai. My castles are 2 level below my rivals and the production speed of my soldiers are rather limited. Most of the time, my army was outnumbered. I learned to let go my ego of banging head on with the hardened enemy and circumvent them using my newly devised methods. 

Having said that amassing a large fleet of ships, large contingent of army and agent units are very taxing on the finance for the rival state. I make a good guess on the financial status and the rice supply status. At every turn, maybe my rivals are not making enough profit to cover the new army created.  

If you guys could recall months back game play at turn 45, I have a couple of metsuke (secret police) running around, coupled with some monks and ninjas. 

My metsukes' was leveled up regularly by apprehending rival agent units at each and every turn. The success rate of apprehending grow slowly from 20% to 95%. While level up, I would choose to develop the bribery skill to the highest level. Usually, the apprehending would be successful, because Tokugawa clan specialty have a +2% of success rate.

I did level up my ninjas' too. Sabotaging rival rice plantations at every turn. This would decrease the rice supply by -1. Beside rice plantations, structures such as castle gate, rice merchant, tea house are possible targets too. If rival army are marching near to my territory, my ninja would sabotage the army to buy me time to lay an ambush. The skill sets of the ninja are build towards the "Ninjutsu" at level6. After my ninjas were leveled up, I start the process of assassinating rival generals, to make the rival army bare naked without the positive influence of a general. 

As for my monks, I send them far back into enemy lines, creating rebellion at poorly garrison castle. Of course, along the way I would use my monks to convert the enemy agent units.

The above 3 steps requires very little money to sustain. The bulk of my profit goes to building elite shock troops. It really took a very long time to build army that are truly useful. 

With my newly acquired army, sufficiently trained agent units and MONEY. The journey of clearing the Hatakeyama clan eastwards begin. At that point of time, having war at both sides of my border is a strict no no to the financial status. At the west borders, I have my agent units sabotaging enemy army and preventing them from marching to my land. At the east borders, my army is still outnumbered by the rivals. Good thing is, not every army are lead by a general. I would use my metsuke to attempt to bribe this category of army. Once successful, I would march my army near to this newly acquired army and enter battle with the rival and try to outnumber them. Once the enemy retreat or loses the battle, I attack the castle and loot the castle. Looting gave my shogunate a 20K income. Remember to set the newly acquired castle to no tax and put a metsuke to oversee the town, just in case of rebellion. 

With the new money, I could attempt to bribe more army. Some army are lead by general. Simple, send in the ninja to attempt assassination. If successful, send in the metsuke to bribe. If successful again, merger the new army with the current ones I have. Send in a ninja to sabotage the castle gate before sending in the merged army of mine. If successful, loot the castle. My rival clan recruited super elite units such as Bow hero, Sword Hero, Yari Hero, Great Guards and more. Bribing this army would make this units at my disposal. Indirectly, my army get level up without upgrading my castle facilities. 

The cycle repeats itself again. With some variations along the way of course.


revenge is sweet.
Game statistics suggesting the gruesome path that leads to the rising of my Tokugawa clan. 

I have created 4 vassal states, just to trade with. Trading will increase the financial profit. Occasional rebels were created by my monks. Then I would send in my generals to put out the rebellion. Indirectly, my generals get to level up!

The characteristic of the Tokugawa clan requires the training of the arts, rather than bushido.

Taxes are on the high side, but the populations are happy! Just train the Daimyo with lots of honour.

One of my awesome general with the traits of "Intimidating"

One of my awesome army with awesome agent units.

Check out my save game