3D printing using NinjaFlex with Makerbot Replicator2 and RepRap Prusa Mendel i3 Durbie v2
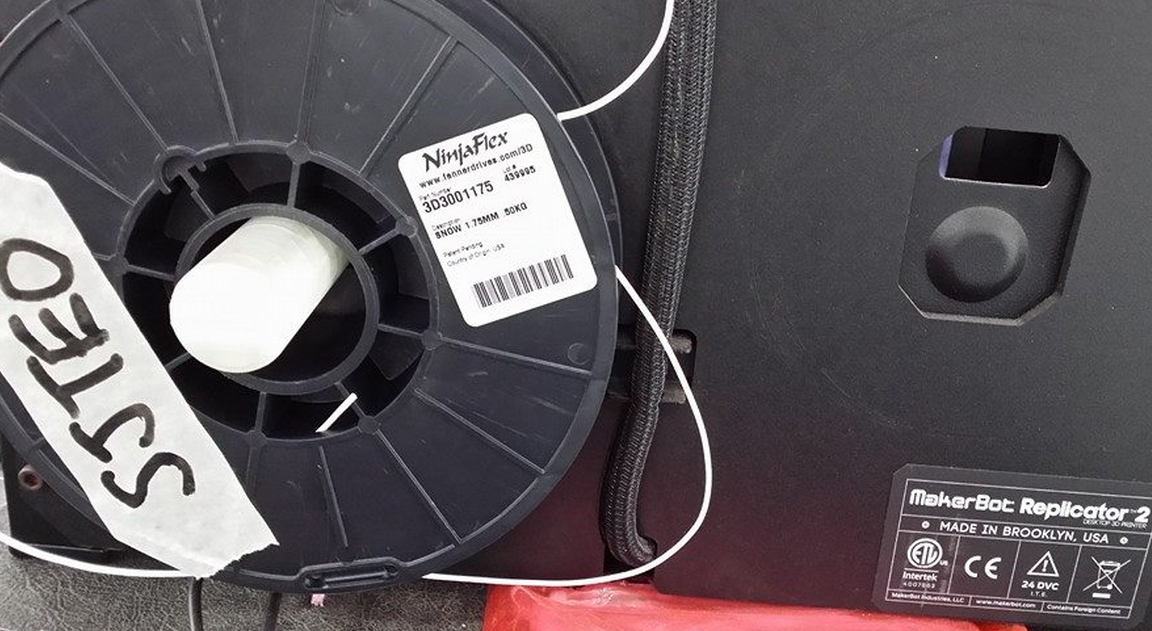
Earlier in February, yours truly came across an exciting new type of 3D printing filament that is flexible, stretchable, thus allows for many creative creations. Say farewell to the rigidity of PLA and ABS! Without hesitance, yours truly ordered a spool of 1.75mm white filament with a local vendor (probably the first spool brought in here) at SGD100 per pop.
May I present to you, the NinjaFlex by Fennel Drives http://www.fennerdrives.com/ninjaflex3dprinting/_/3d/ . 
Finally over the last few days, yours truly manage to find some time to play with this excellent new type of filament. Prior to commit, it is best to read the manufacturer’s website and adafruit’s tutorial, and by following the recommended best practices for 3D printing with this NinjaFlex should be a breeze. Technically I summarized from the reading materials, if I followed the recommended extruder temperature of 215degC, non heated bed, and blue tape on the printing bed; it is going to be minimal effort to install the NinjaFlex and we can have a lot of creative fun happening here at FabLab@SP.
Sorry to throw in the wet blanket. The experiment with NinjaFlex is not a breeze, even with the prior knowledge well versed; hence there is a need to raise some awareness and share some experience on how to get it right (or way wrong) with NinjaFlex. Courtesy of FabLab@SP, yours truly has the luxury of tens of makerbot replicator2 at his disposal, and a well-stocked personal arsenal; you guess what, it consist of a 3D printer the RepRap Prusa Mendel i3 Durbie v2
Few important parameters that decide the success rate of 3D printing with NinjaFlex: filament feeder mechanism (FFM), extruder hot end (EHE) temperature, heated printer bed (HPB) temperature, type of tape used on printer bed, and extruder extruding speed (EES). Gathering from the reading material over the Internet, NinjaFlex has a specific operating temperature; users reported success with EHE set at 215 to 225 degC, and HPB set at 30 to 50degC. The filament is flexible and stretchable, sticks well to kapton tape; others reported success on blue tape, scotch tape, and acrylic. However, due to the partiality of info provided by various users that reported success, it is difficult to replicate their success at our end.
Hence yours truly has done several A/B test for NinjaFlex on both makerbot replicator2 and reprap, and varying the parameters.
Experiment1: NinjaFlex 3D printing with Makerbot replicator2 using modified MK2 FFM, non HPB, blue tape on printer bed.
All the makerbot replicator2 in FabLab@SP are modified with spring loaded FFM, as depicted in the picture above. Spring loaded FFM is the must have to print NinjaFlex on makerbot replicator. All parameters such as EHE at 218degC, non HPB, blue-tape on printer bed, EES at 40mm/s are held constant. On first try or maybe it is beginner’s luck, NinjaFlex is loaded successfully, FFM is feeding NinjaFlex with no qualms during loading phase. Next, when it comes to 3D printing with NinjaFlex, the material refuses to stick on the existing printer bed with blue tape, thus excess material clogged the nozzle. Subsequent tries to print, no material is oozing from the nozzle. So, carry out the SOP of unloading the filament, and then clear any material that clog the hot end or drive gear chamber. The next many hours to reload the NinjaFlex are frustrating. First of all, the filament itself is limp, lack the stiffness of PLA, thus it is becoming increasingly difficult to fish the filament through the guide hole. Even though the filament is fished properly through the guide hole, but no material is extruded through the nozzle. The filament is fed continuously in the whole process alright, but somehow, nothing is extruded. Open up the extruder to check for any jammed material at the hole entering the hot end, nothing. So basically the couple of hours are spent on repetitive cycle trying to load the NinjaFlex. The next logical step is to observe ninjaflex filament feeding into the extruder without the heat sink and fan. Surprise!! The filament is winding up in the drive gear. So to conclude this experiment: ninjaflex does not stick to blue tape, filament is too limp to be fed 100% correctly.
Experiment2: NinjaFlex 3D printing with RepRap Prusa Mendel i3 Durbie v2, HPB, kapton tape on printer bed.
All parameters such as EHE at 218degC, HPB at 40degC, kapton tape on printer bed, EES at 40mm/s are held constant.
Due to the design of the geared extruder, loading the limp filament is a breeze compared to makerbot replicator2. All need to be done basically to loosen the 2 spring loaded screws, manually fish the filament through the guide holes and also into the hot end, tighten the screws and then extrude filament to check for proper feed.
On the first try to print, the ninjaflex did sticks very well indeed to kapton tape. Besides kapton tape, subsequent tries on HPB’s glass plate but without kapton tape sticks well too.
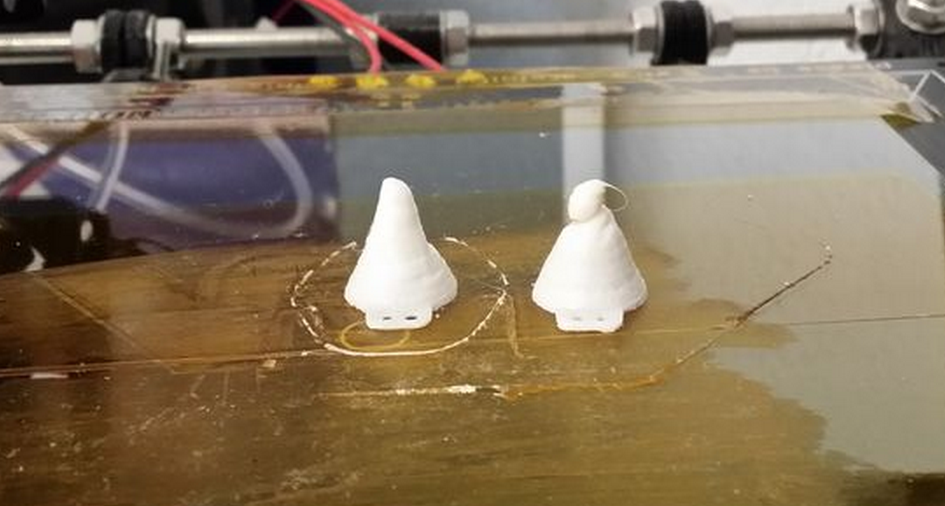
3D Printing win NinjaFlex using RepRap went well. All is left is to fine tune the parameters to achieve the ideal result. Cone on the right is first try, left is second try. 
Once the 3D printing parameters are tune with confidence, try it on a bigger print job to check whether 3D printing NinjaFlex with RepRap lives up to it’s reputation. The parameters used are EHE at 220degC, HPB at 40degC, kapton tape on printer bed, EES at 20mm/s. The following parameter is peculiar only to slic3r for ninjaFlex: Fill pattern rectilinear, Infill 50%, 3 shells, 4 skirt loops, layer height 0.2mm,
The first few layers printed according to expectations, however, half way through a 3hour print job of a note3 bumper, the ninjaflex filament is not feeding and starts to air printing. After a few tries with the smaller test prints, apparently the nozzle clogs at random layers and hence air printing too.
While issuing a new test prints, out of sudden the reprap is not printing and pronterface can’t connect to the reprap. First, the ninjaflex is working only to air print randomly, then the reprap stop responding. The experimentation with NinjaFlex on reprap can’t be continued, until the issue with RepRap is resolved. What a bad day to do experiment. The semi conclusion will be NinjaFlex sticks well to kapton (and also glass panel tested before the RepRap went cold), printing with RepRap is a breeze; but need to resolve the air printing.
Experiment3: NinjaFlex 3D printing with Makerbot replicator2 using modified flexMK8 FFM, non HPB, blue tape on half of printer bed, and the other half is clear acrylic.
For experiment1, the suggestion is to find a better spring loaded FFM that ensures 100% chance of feeding the NinjaFlex into the hot end of the extruder. There is ready solution for open source printers, such as the lulzbot flexystruder http://www.lulzbot.com/products/flexystruder-tool-head tailored specifically for NinjaFlex type of filaments. However, not suitable for makerbot replicator2. I guess the good people at fennel drives are serious about their ninjaflex product, reads about the user comment on Internet and thus uploaded a FFM mod http://www.thingiverse.com/thing:169086/ 
This mod is very easy to install. Simply print out on the existing 3D printer, let it cool by turning off the power supply, and disassemble the existing FFM to be replaced with the flexMK8.
Loading of the NinjaFlex into Makerbot replicator2 could have been easier!!! It takes only a single try to load!
The parameters used are EHE at 220degC, non HPB, EES at 20mm/s. The following parameter is peculiar only to makerware for ninjaFlex: Infill 10%, 2 shells, layer height 0.2mm. As for the test print, see for yourself.
As suspected, NinjaFlex sticks better on clear acrylic than blue tape on printer bed.
Confidence are built upon many unsuccessful experiments. The first big print job that takes 4 hours to complete with NinjaFlex.
Of course, the experiment with NinjaFlex comes complete with the adafruit cyberpunk spikes
Concluding experiment3: use flexMk8 with makerbot replicator2 for a successful loading, as for the parameters used are EHE at 220degC, non HPB, EES at 20mm/s. The following parameter is peculiar only to makerware for ninjaFlex: Infill 10%, 2 shells, layer height 0.2mm.
Outstanding task: fix the RepRap and then continue to find the best parameter to print NinjaFlex.
References

3 comments:
Aluminum Heat Sinks -This is a great content post and I think this is useful for readers.
it is really amazing post and i really appreciate your help Thanks alot read this one as well
https://www.3dprintingio.com/monoprice-3d-printer-review
Such a nice charger you have printed on the 3D printer. I use a wooden phone charger. It is more durable and safe as wood is another none conducting material. You can visit the kerf case to look out for more wooden accessories including phone cases.
Post a Comment