Showing posts with label laser cutting. Show all posts

Friday, July 4, 2014

Engrave photo on wood with a laser cutter

Engrave photo on wood with a laser cutter
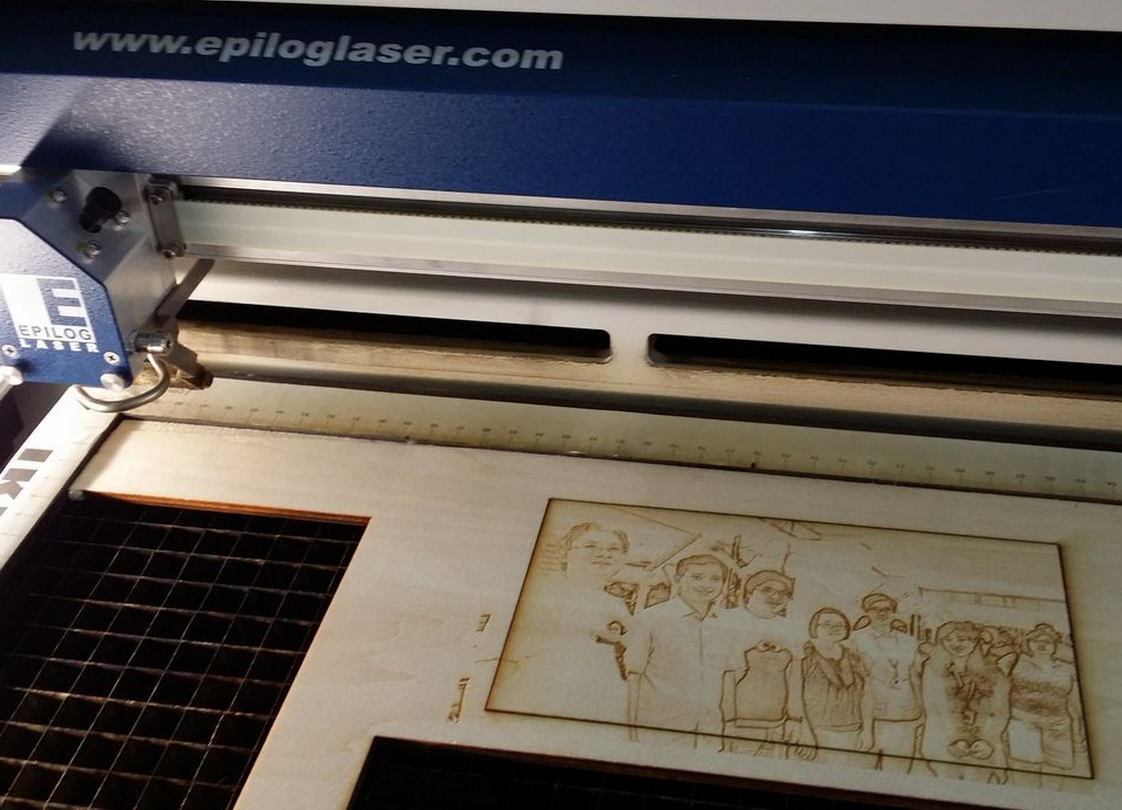
A photo or image can be realized on a piece of wood with the use of laser cutter. The process is simple. First, the photo has to be digitally manipulated. This photo is then sent to “print” via the laser cutter using popular vector drawing software such as coreldraw.
To digitally manipulate the subjects composed in a colour photo, popular vector drawing software such as coreldraw (proprietary), inkscape (open source) can be used for manipulating it into greyscale, and then subjects are outlined in black. The varying shades of grey, and black outlines determines how much power the laser cutter should output to engrave the piece of wood via the “rastering” mode. The darker the region, the more power will be output to “engrave” the wood by burning parts of it.
In FabLab@SP, 3 laser cutters are available; The Epilog, The Rayjet, and the HAS. The general steps to engrave photo are similar, but the parameters to set for laser cutting associated to different type of laser cutters are slightly different.
Parts needed
  1. A piece of wood; balsa, plywood will do. Preferably 3mm or 5mm.
  2. Access to a laser cutter. This guide assumes access to the epilog laser cutter
  3. Access to a vector drawing software, or photo manipulating software such as adobe photoshop, coreldraw, inkscape, etc. In this guide, an online photo editor www.ribbet.com is used.
  4. A photo of choice.
Step1: upload photo to be edited to www.ribbet.com
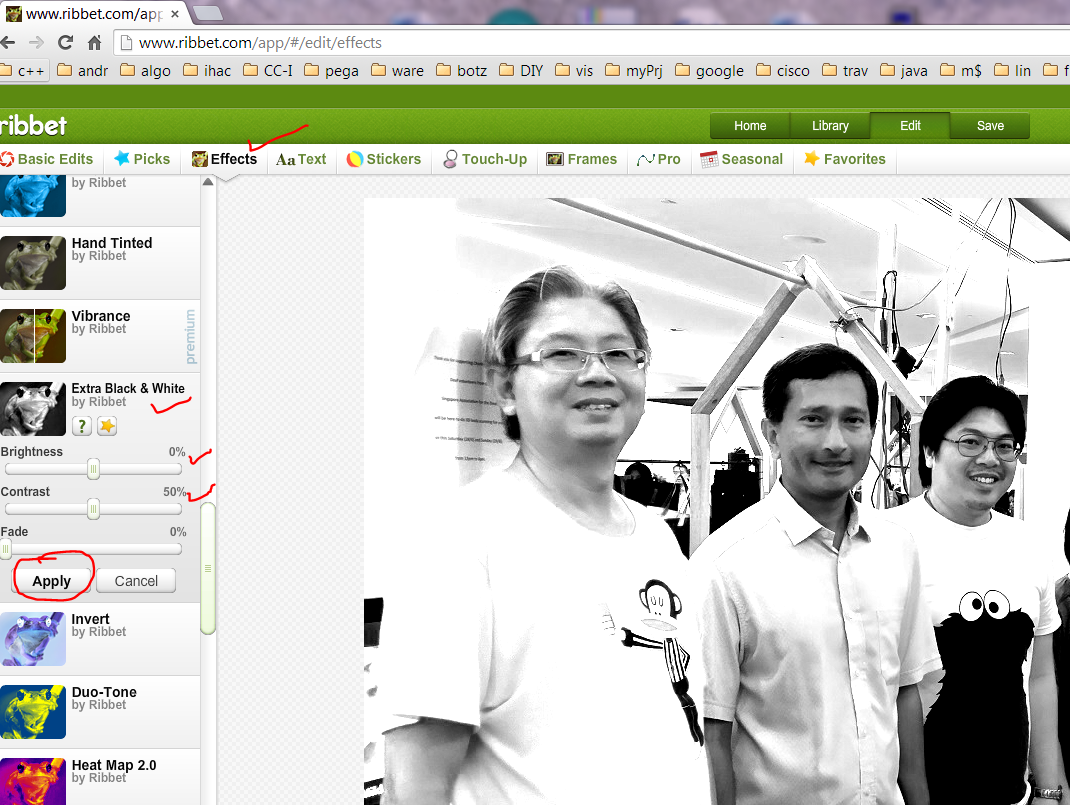
Step2: Click on “effects”, then scroll to “Extra Black&White”. Manipulate the 2 sliders “Brightness” & “Contrast” to achieve the desired outcome as per depicted in the following diagram. Desired outcome to be achieved can be defined by “high contras on specific features, such as facial features of the subject(s)”, “white-out background to give a strong highlight on the subject”
D:\Users\s41764\Desktop\laser cut stuff\ribbet1.PNG
Step3: Still in “effects” tab, scroll to “pencil sketch”. This effect will highlight outline the subjects as per the black & white photo, by giving a darker shade of grey at the edges. Manipulate the sliders “radius” and “strength” until the subjects are “standing out” from the background and gives a lasting impession.
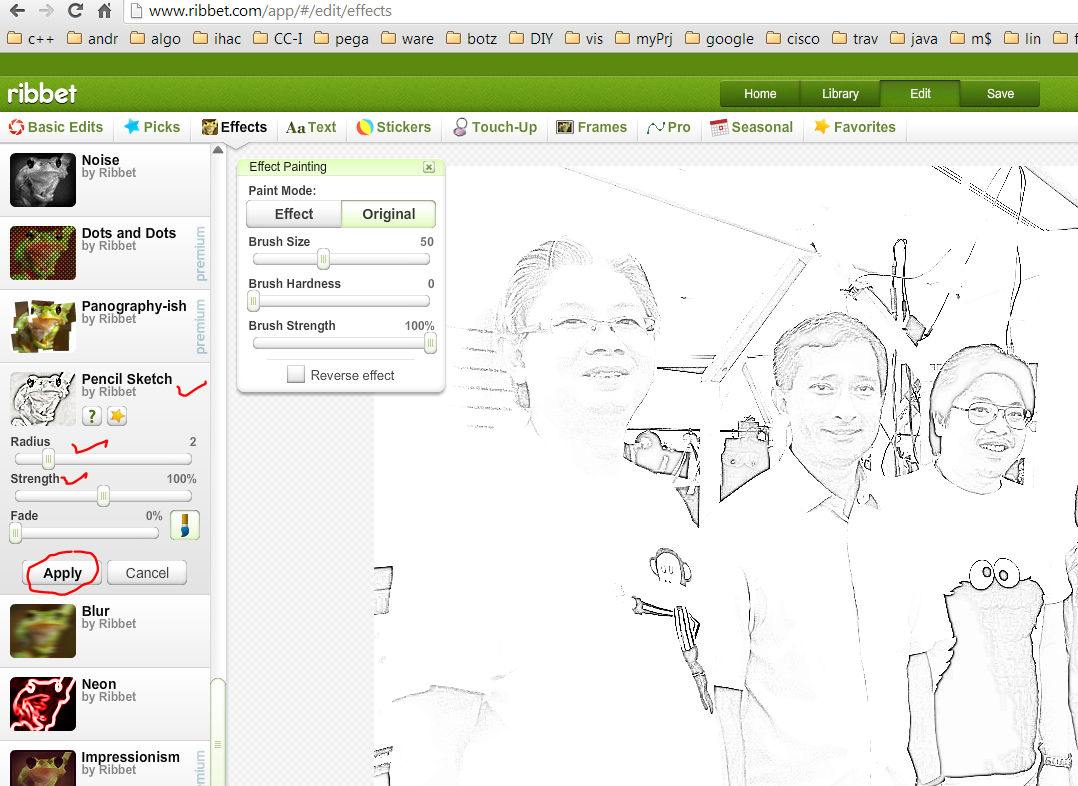
D:\Users\s41764\Desktop\laser cut stuff\ribbet2.PNG
Step4: save the manipulated photo on the computer as *.JPG.
Step5: On the computer that is connected to the laser cutter, use coreldraw to create a new canvas of the type “fusion table”. Open the manipulated photo in coreldraw, position the photo such that it corresponds to the piece of wood where it will be laser cut. Select the box drawing tool on the LHS and enclosed it on the picture. Then select the line thickness of the box to be “hairline”. This setting corresponds to cutting a box shape surrounding the photo. The following diagram explains it all.
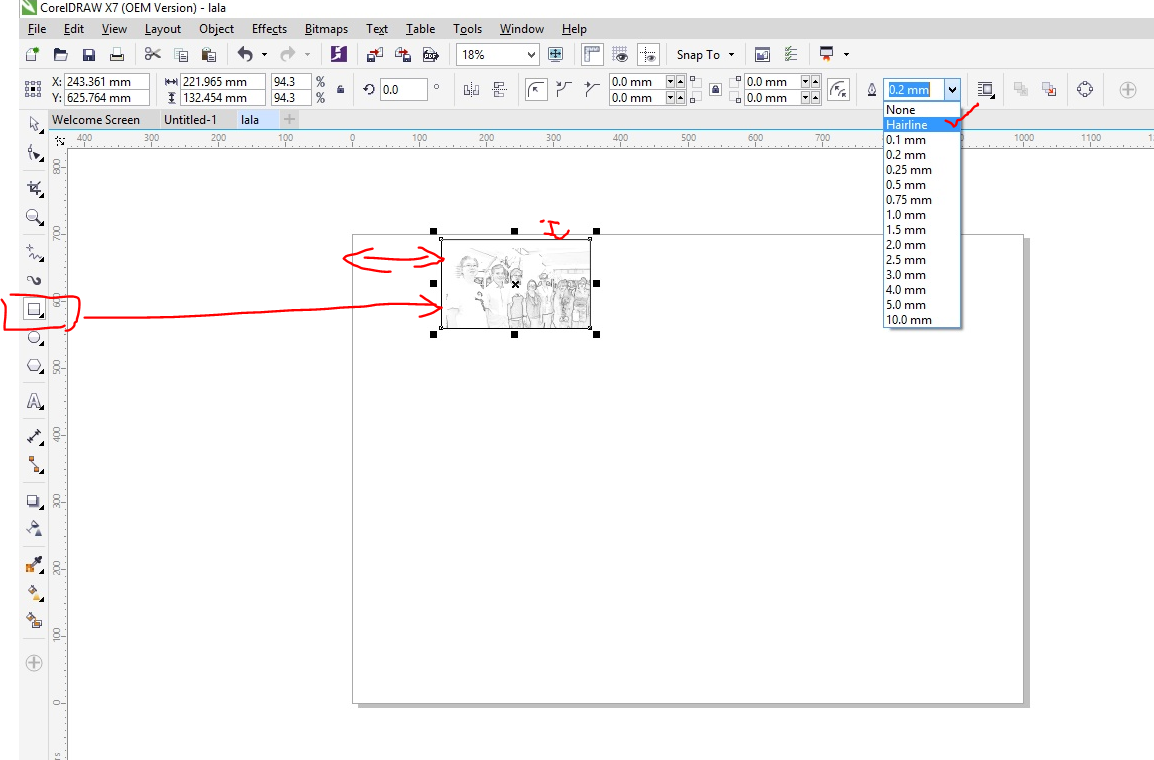
Step6. Load the piece of wood into the laser cutter
Step7. It is crucial to ensure the canvas chosen for laser cutting is of the type “Fusion Table”. File-> print OR Press on the “print” logo. A popup box will then appear. Ensure that the printer is “Epilog” and not your regular paper printer, and then click on preference to modify parameters that are essential to the quality of the laser cutting output. The following diagram illustrates it.
Step8. Select laser cutting parameters such as thickness of the material, job type, speed, power, and frequency and then press “OK”. Each of the manufacturers has meted out recommended settings to the parameters in a lookup table form for different type of material. In this guide, a 5mm thick plywood is used. Assuming the output of this laser cutting is very faint or hardly noticeable, it is recommended to crank up the power and lower down the speed. Otherwise if the output of this laser cutting appears to be burnt at the edges.
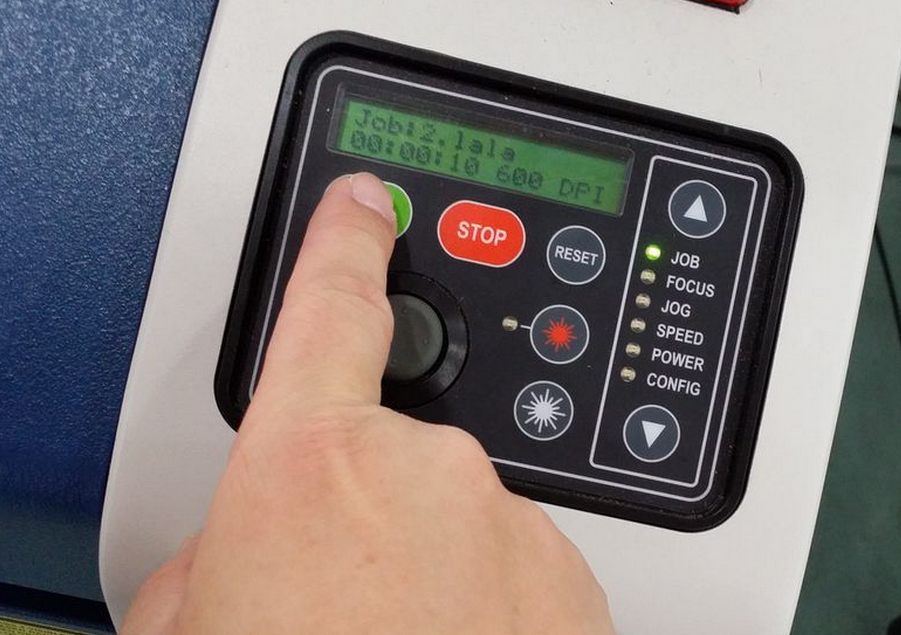
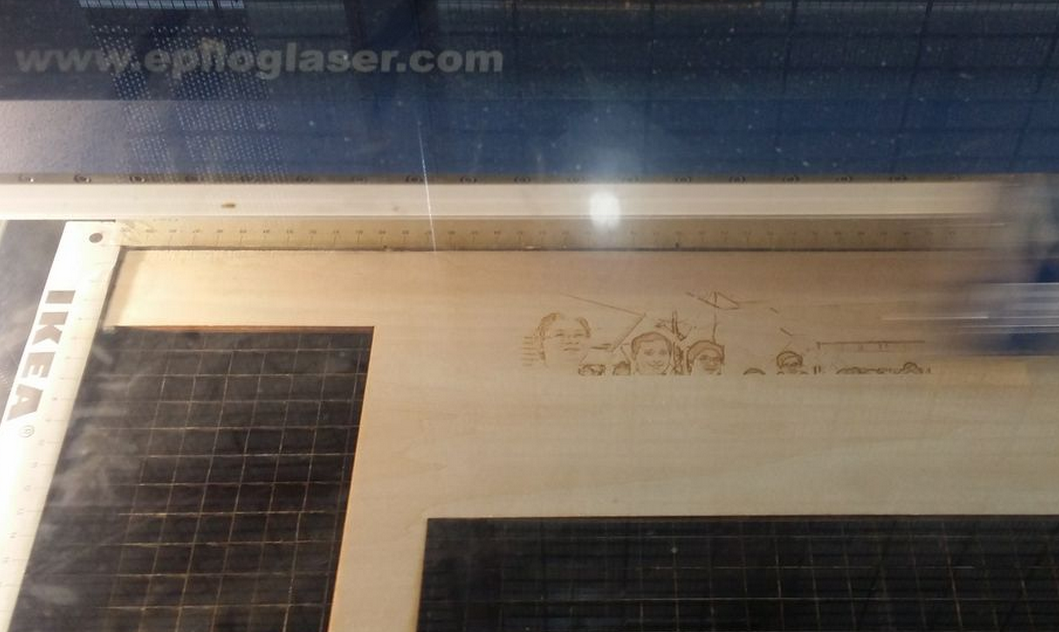
Step9: Close the protective cover of the laser cutter with the wood properly aligned in it and then press “GO” on the control panel. Observe the magic!
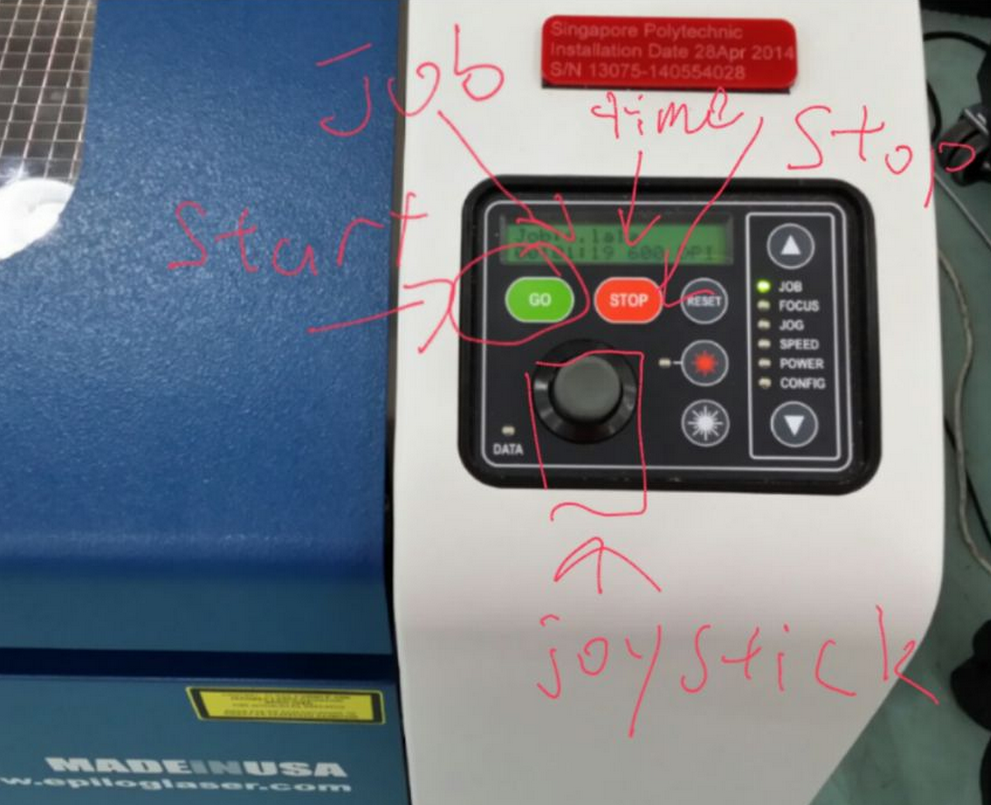
Brought to you by FabLab@SP

Saturday, May 3, 2014

Laser Cutting: glamourized an unloved old tshirt

Here at FabLab@SP, the techno arsenal's capacity  is increased over the last few months. One such is the count of laser cutter now sitting working busily on the production floor.
Laser cutter has been the workhorse for any given FabLab/TechShop; it cuts precisely on a variety of material ranging from wood to fabric. It is music to the ears for people like me that can hardly cut a straight line using a pair of scissors or a pen knife.

Initially, there is only one laser cutter, the HAS system. Yours truly has been well acquainted with laser cutters from manufacturers such as epilog, and universal; but the HAS system is definitely a first timer. The quirky-ness of the HAS system warrant a blog post for itself. So how quirky is quirky? The software interface is in "deutch"; not only that, yours truly failed to "google" for the specs of this system given the identification marking found on the surface of this system. Then comes the rayjet, a "mobile" desktop size (having said desktop, it comes with it's own wheelie) laser cutter; smaller bed size is traded off for mobility. Last week, finally the epilog laser cutter is awaiting to be commissioned into the production floor. Having the laser cutter itself is not sufficient without the proper fume extraction kit. Having said kit, it stands as tall as 3 mini bar fridges stacking on top of each other.

This post is not much of an SOP on how to operate a laser cutter, but rather what to make with the laser cutter. The lasses (the laser cutting girls: shar, eugenia, lei) whom intern at FabLab@SP has found good use of the laser cutter by glamourizing an old tshirt in their "free" time. The process describe below is generic for laser cutting of old tshirt on any variety of laser cutter.

Parts needed
1. old tshirt
2. digital design (e.g leopard print)
3. access to laser cutter

Work flow
Prep the old tshirt
1. find a piece of board that is 3mm thick wood/acrylic with sufficiently large surface that is lying around in the FabLab@SP; the surface area is relative to the size of the tshirt to be cut
2. insert the "board" into the tshirt, identify and measure the area to be laser cut
3. stretch the tshirt and then secure the edges with some paper clips/scotch tape

Prep the digital design
Note: digital fabrication with laser cutter, the software that is used to draw the cutting line must be 0.01mm or "hairline" thick, in "black" colour to cut on the HAS (but in "red" on the rayjet and universal). Pre-processing a picture file to be laser cut is a must!
1. Choose drawing software of choice, e.g adobe illustrator, inkscape, librecad, etc.
2. Open a picture/design/pattern of choice. In this example, eugenia has downloaded wild life pictures of leopard rosette pattern.
3. create another "layer" on top of the "picture with leopard rosette pattern", and then trace the outline of the rosette with black lines configured accordingly to the above mentioned requirements.
3a. Eugenia found a way to reduce the time needed to trace the rosette. I shall not spill the beans but you can observe from the file uploaded.
4. delete the underlying picture file and export it to a format that is friendly to vector drawing software (e.g coreldraw)
5. the resulting file from this process ready to be laser cut is available here https://www.dropbox.com/s/704scb3g6gwvg9d/leopard%20prints.ai

Prep the laser cutter for cutting
0. align the tshirt to the bed of the laser cutter with the cutting surface facing up
1. calibrate the height of the Z-axis. This calibration process differs between the laser cutter manufacturers. Time to RTFM!
2. import the digital design into the vector drawing software (eg CorelDraw)
3. commence SOP of laser cutting; setting used to laser cut on cotton fabric is 25% power, 100% speed; the setting might differ from laser cutter to laser cutter.
4. examine the end result

What is a post worth without pictures?


Prep the tshirt and align on the bed of laser cutter


Preparing digital design to be laser cut on coreldraw


laser cutting of the digital design in process


Examine the end result from laser cutting


The bits and pieces of cotton fabric is easily removed


Examine the expectations between human's mental visualization and the digitally fabricated design.

Now, time to realize some of yours truly digital apparel designs that are ed-hardy-ish

Saturday, April 5, 2014

Repurpose old hard disk as centrifuge

Repurpose old hard disk as centrifuge
Sambal, one of my favourite condiment; technically, it goes well with ANYTHING. Did I said ANYTHING?! YES, ANYTHING! Not surprisingly, in the cold, wet, and miserable winter in London; the thought of having sambal served over nasi lemak lingers. But the exorbitant price of 12quid per pathetic serving at a nearby stall really puts me off. It is the state of the mind when it is to overcome hunger and bad weather.
Usually, sambal is prepared in big quantities and distributed to the family members. Having been familiarized with the tedious operation of preparing sambal and the amount of oil used, I do wonder if the oil content in a sambal is removed one way or the other, will it still taste the same? Several ways I have experimented. The most classic method is to let the sambal sit for several hours, until a layer of oil surfaced and then siphoned off. Being the geek one, I wonder if having sambal applied with centrifugal force to separate the solid from the liquid; does it matters at all to the taste, texture, and most importantly to the health conscious ones.  
Knowing that I have a zero chance of getting my paws on a centrifuge without cutting the red tape and overcome the bureaucracy, I have decided to make one myself. Having considered the relationship between the materials to be separated react differently to the amount of time, RPM, centrifugal force applied to it; I need a mechanism that spins at high RPM, and a mechanism to computerized the parameters to be applied to the centrifuge. So I started by making the mechanism that spins, just for the instant gratification of looking at something that spins. The computerized portion, I have thoughts of using an optical encoder to calculate the RPM, and an ESC motor controller to regulate the RPM, and also a computerized timer. This make will come at a stage after the spinning mechanism is done.
Bill of Materials: You will need the following to make a mechanism that spins at high RPM.
  1. Unloved old hard disk drive. I am using WD400EB.
  2. Custom Laser cut acrylic disk to fit the spindle of the hard drive
  3. Custom laser cut acrylic hub to fit an eppendorf or two
Having the long history of extracting rare earth magnets from many hard disks from different manufacturer; I find the WD400EB is the easiest to dismantle. My criterion of a good to dismantle hard disk is as follow: no quirky proprietary screws, no screws secured with torque that a human powered muscle cannot handled, and simplistic “clam shell” design.
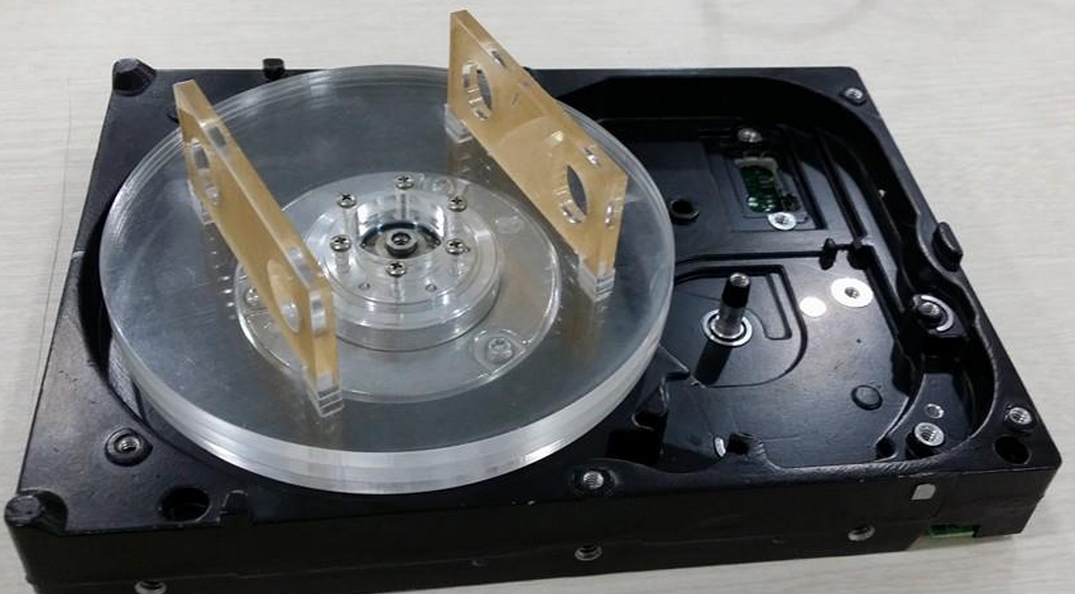
WD400EB with innards removed. Note the M2 screw size used on the spindle is arranged at 60degrees a part, relatively to the spinning axis.
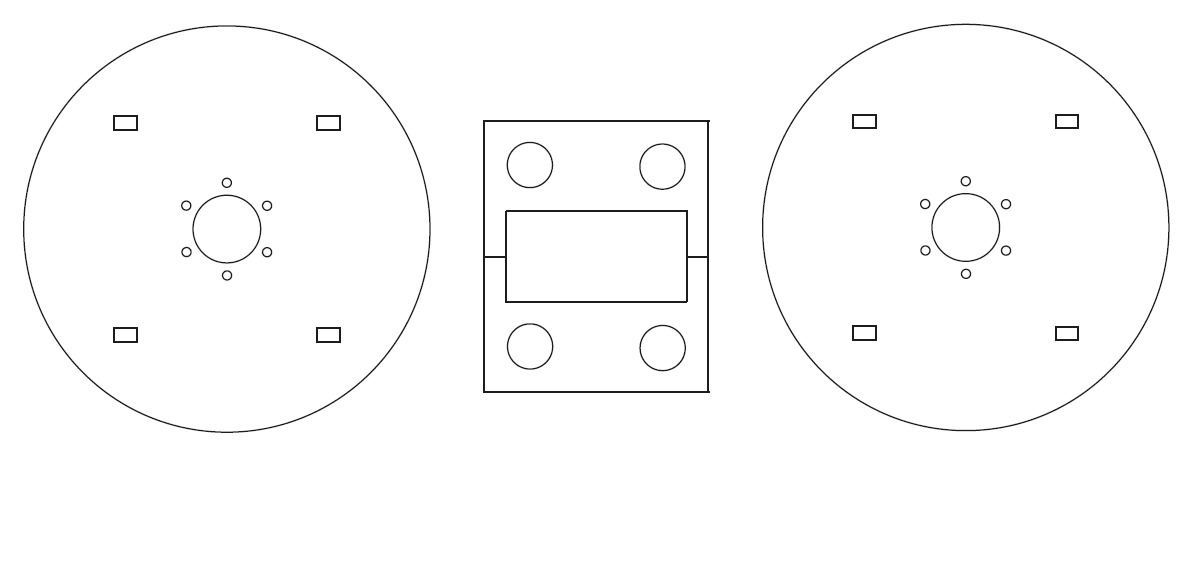
First iteration of the custom laser cut acrylic disk to determine the right fit. The exact measurements of the screw size, the location of the screws, the diameter of the disk, and the location to place the hub need to be determined. The diameter of the disk is 90mm, 6x M2 screws positioned at 60 degrees apart relatively to the axis.
This the following diagram with the exact measurement is sent to the laser cutter to be cut on 3mm thick acrylic. Thanks to my kaki asri and syazwan for manning the laser cutting!
Subsequent iteration of custom laser cut disk and hub to secure 4 eppendorf is assembled on the hard disk.
Spin baby spin!!!
Till last Friday end of office hours I can’t get my hands on an Eppendorf to carry out the sambal experiment. So I decided to pull a scrambled egg prank on the missus (yeah, I know april fools day is over few days ago). I would devise a contraction to spin an egg in the shell at 5400RPM. the content inside of the egg will be scrambled after subjecting to centrifugal force. Put that egg back into the fridge at the exact location where she will take an egg to make a sunny side up the next morning. Then, SURPRISED!!! I did have the thought of scrambled all the eggs in the fridge, but egg omelette, egg custard,  chawanmushi for the next few days?! no way!
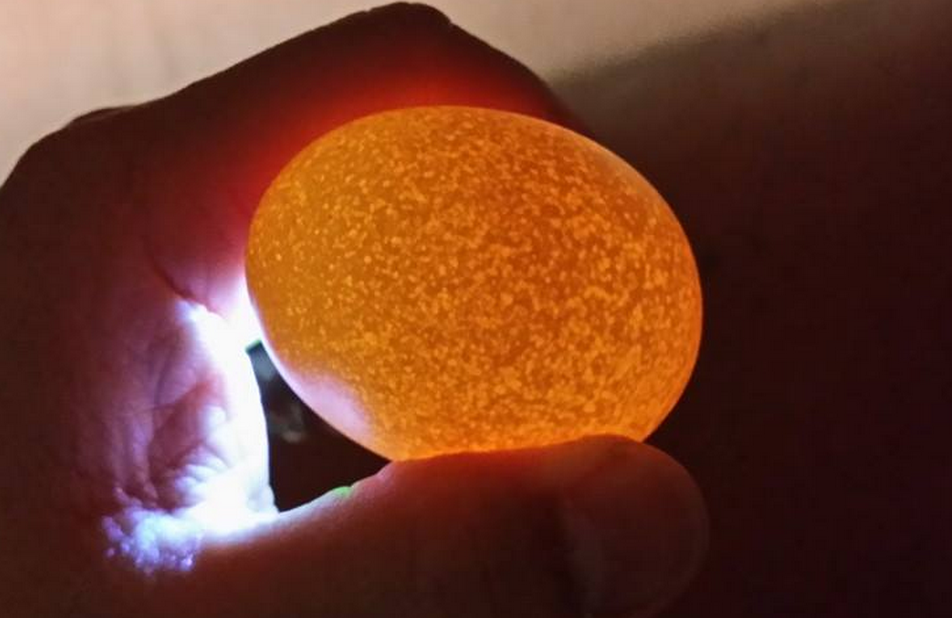
This is how an undisturbed egg looks like under LED light. Once the egg is applied with centrifugal force, the content will be cloudy because the content is scrambled.
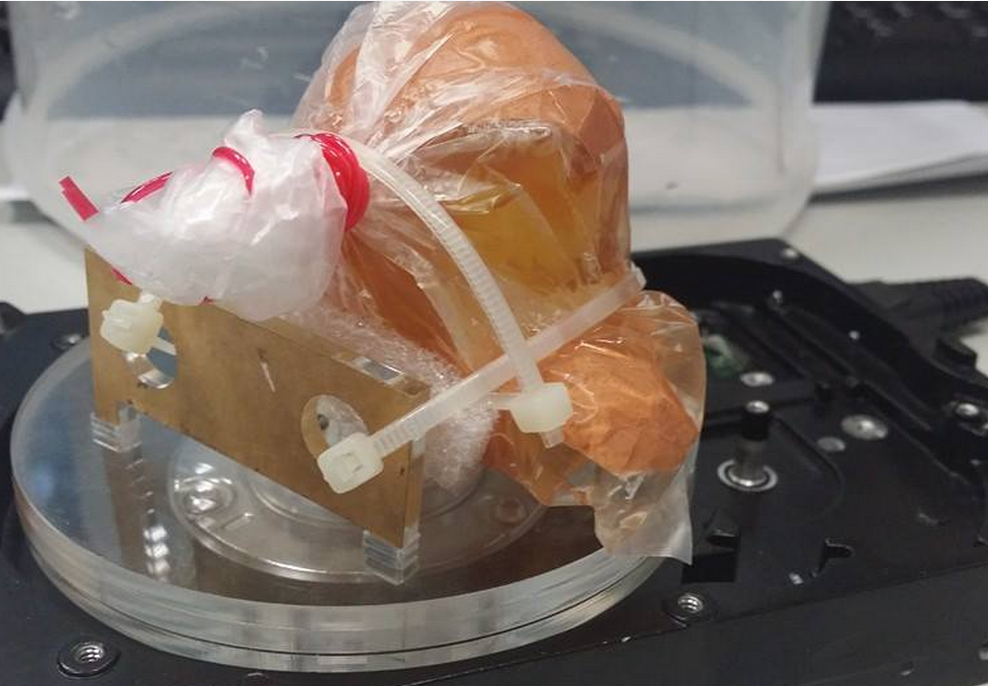
The egg does not fit the Eppendorf hub snugly; hence need a contraction of some sort to hold it in place.
After some design considerations, it is best to secure the egg in a plastic bag for insurance. The cable ties are meant to hold the egg in position.
When doing at experiment, it is very important to consider all the safety aspects; especially on the issue of failed experiment due to the malfunction of test equipment. In the case of dislodged parts at high RPM with respectable amount of centrifugal force, the projectile can be deadly. I have used one of my ex-project’s container turned upside down to contain any possible projectile and splatter. Of course, the material strength of the container need to be proportionate to the force going to be applied. I would definitely use my 20mm thick polycarbonate container if it is available, but it was discarded as junk when i was away.
Fingers crossed and let’s get started!!! Igor, pull the switch !!!!!!!!!!!
The aftermath of spinning at 5400RPM…. The egg splattered because the shell is acting against the cable tie at high G and gave way. The good thing is, at design stage I have considered the possible outcomes and decide to place the egg in a plastic bag for insurance. My insurance paid off! No messy aftermath to clean up!!! The down side, missus will not be pranked until I devise a better contraction to hold the egg.

Oh wait….. I forgot that I don’t have a missus yet.